1/9
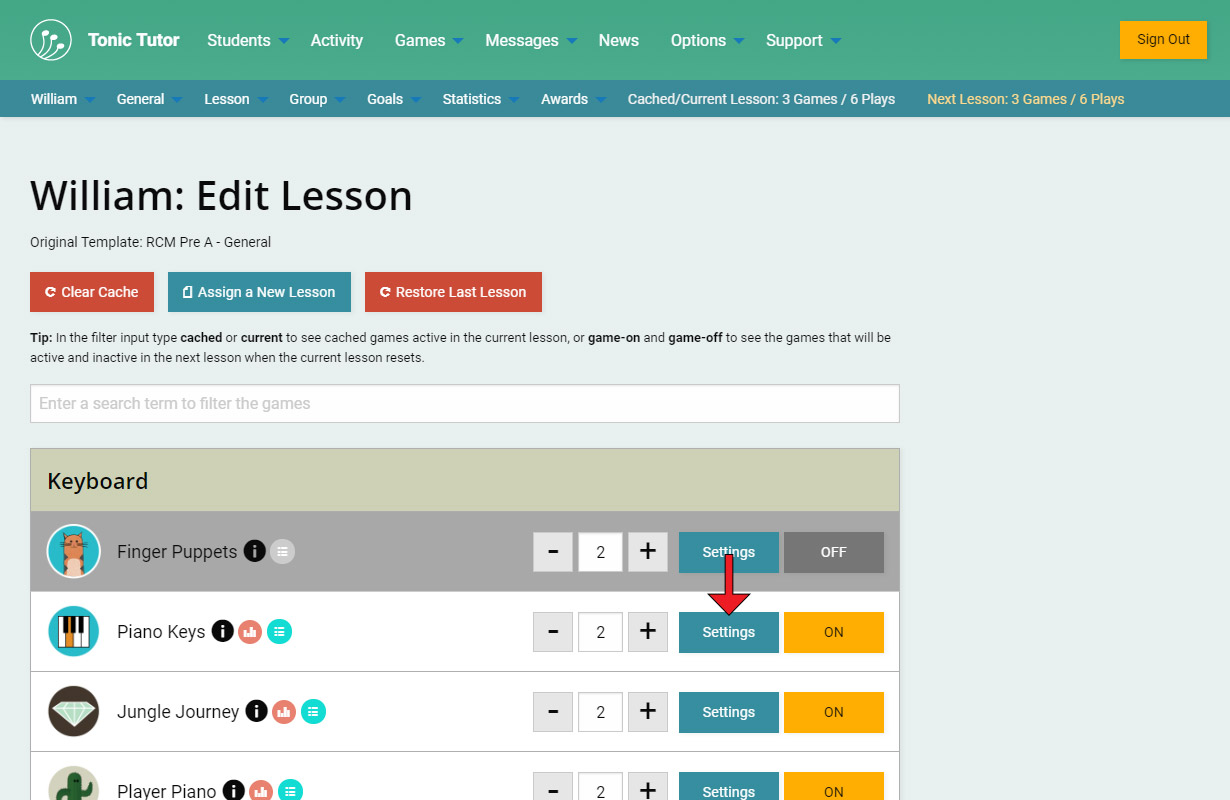
Each game on Tonic Tutor has unique game settings that you can use to modify the difficulty of the game or control the type of skills and pedagogical content it targets. You can micromanage a student's lesson at a very granular level, but it's important to remember it's optional. You can use the lesson templates and never change a game setting and still have tons of success using Tonic Tutor with your students. It's there to use if you want that amount of control. As we covered in the last tutorial, you can use the Settings button on the Edit Lesson page to change the settings for a game.
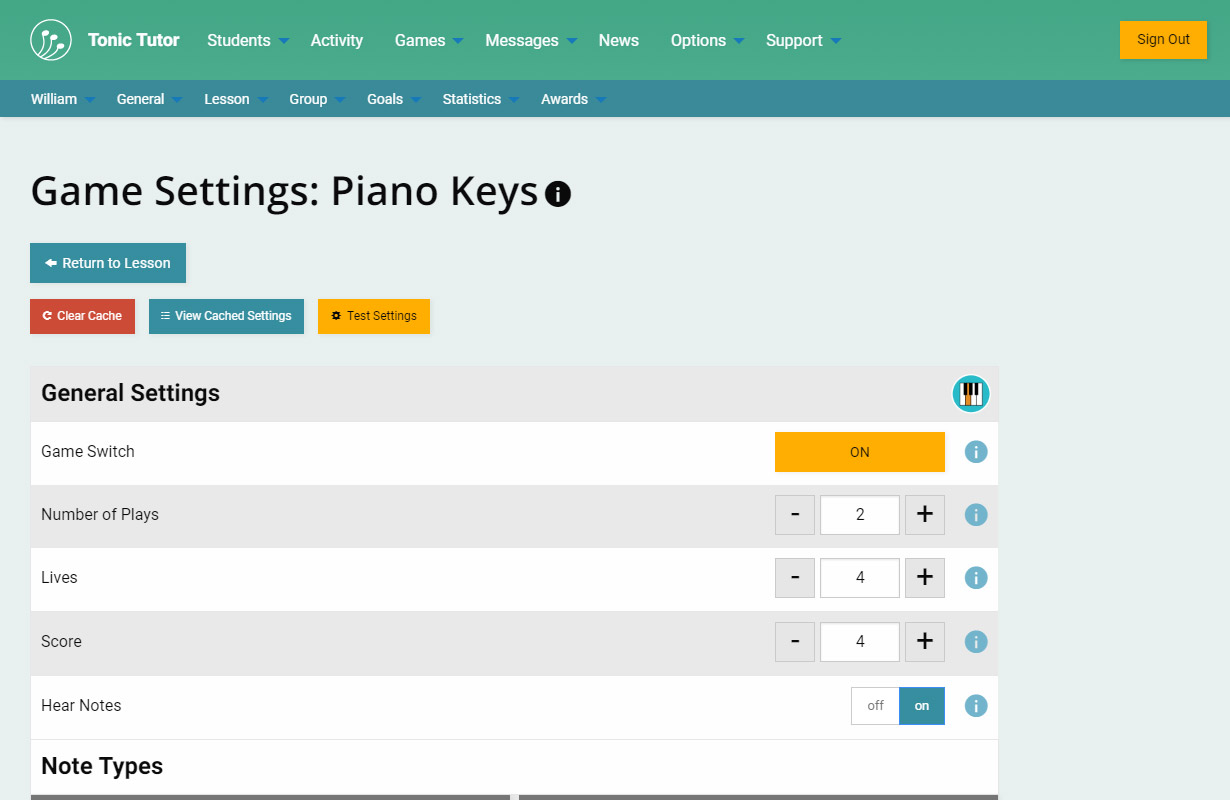
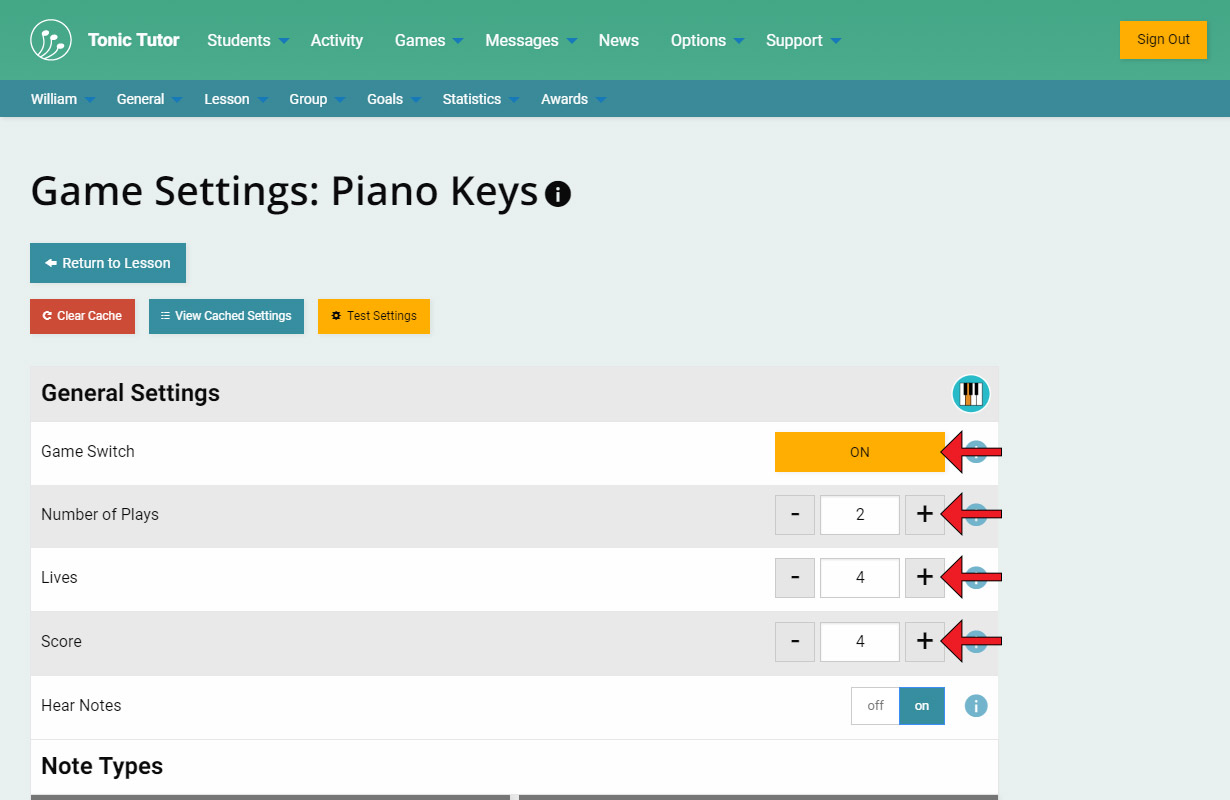
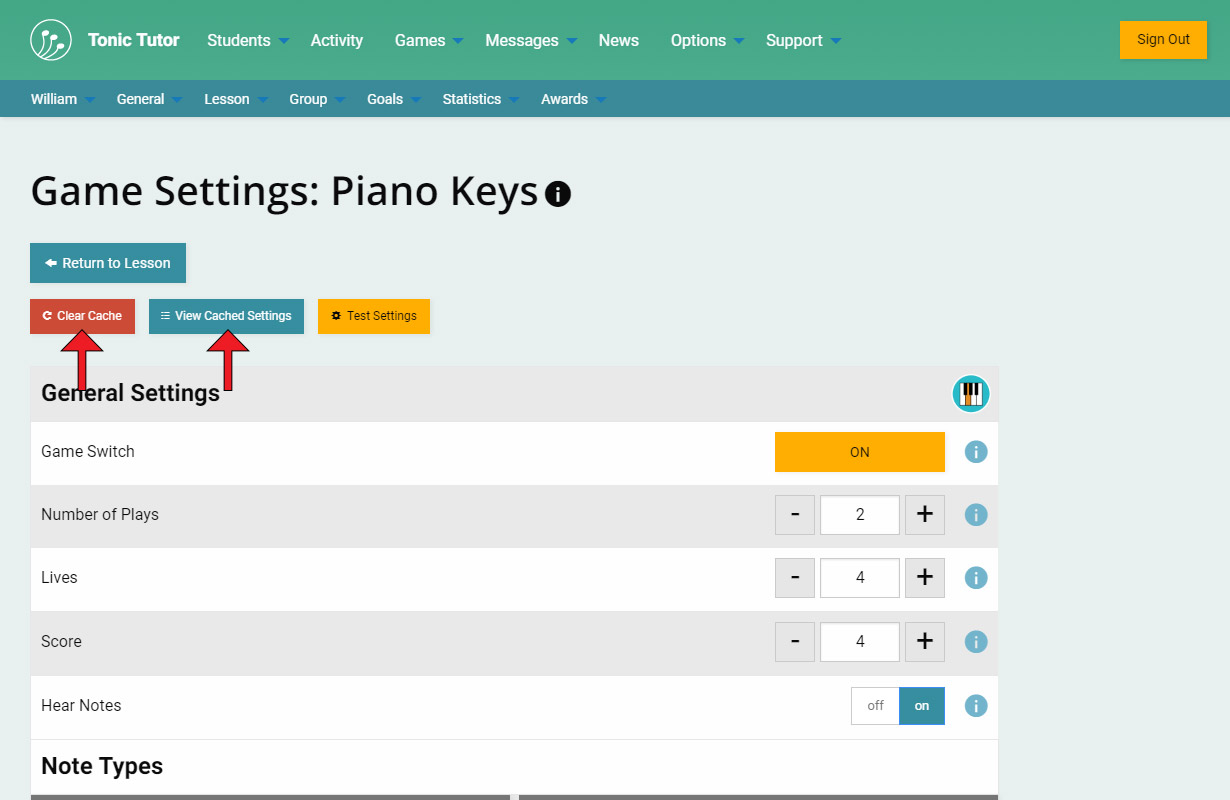
The Game Settings page for each game has a lot of bells and levers you can control. The i icon next to the game name in the title works the same way it does on the Edit Lesson page. The settings themselves work the same way as well: make a change and it saves your changes instantly. If you see a blue i icon next to a game setting input, you can hover over it (or tap on it if you're on a touch device) to see a description of the setting.
Most of the games share some common settings: the Game Switch and Number of Plays (which are both the same as the settings you can change on the Edit Lesson page), along with Lives and Score. Some games don't use lives or scores, but every game will allow you to set the number of plays and turn the game off and on.
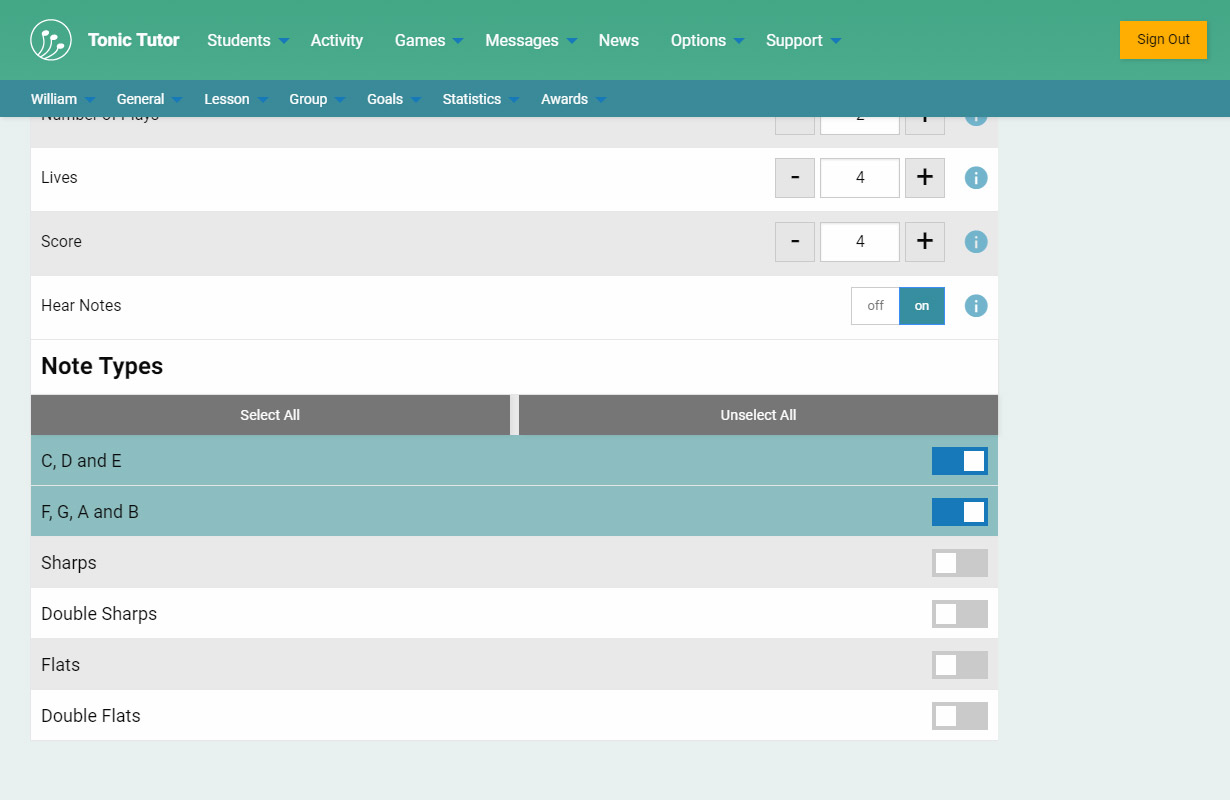
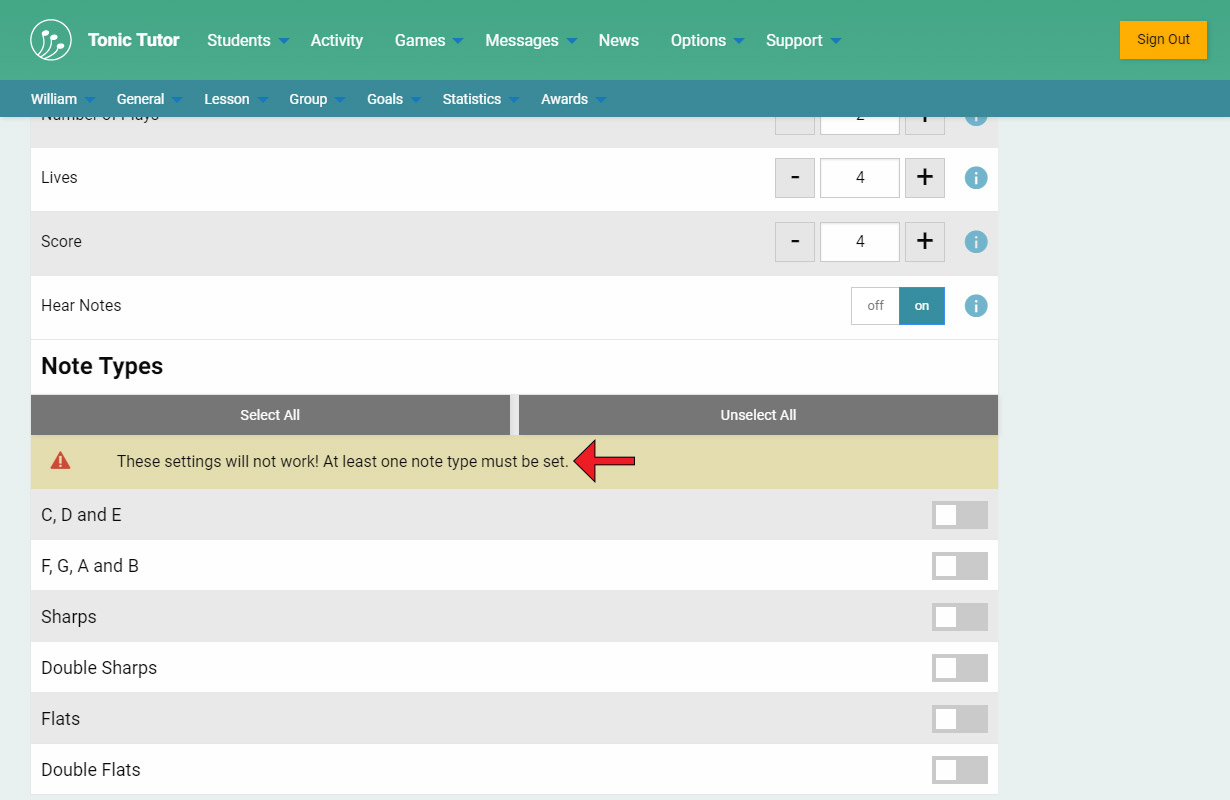
Below that will be settings that are unique to the game you're editing. If the game option uses a drop-down menu, you can change the setting by selecting a new value. Some settings (like the Note Types section for Piano Keys) uses switches. You can click or tap anywhere on the box that contains the label and switch to toggle it. Note the Select All and Unselect All buttons: whenever you see these you can use them to toggle all of the switches in one easy step.
Some settings are validated when you make changes, and if the settings are invalid an error message will be displayed. For example, in the screenshot, you can see that I've turned off the note type switches that were active. Oops! That's an issue because we need at least one note type (how would the game work without notes!). Tonic Tutor makes it pretty obvious when the game settings aren't valid. It will even show an alert if you try to navigate away from the page without fixing the issue. In this situation, selecting a note type so that it's active will cause the warning message to disappear.
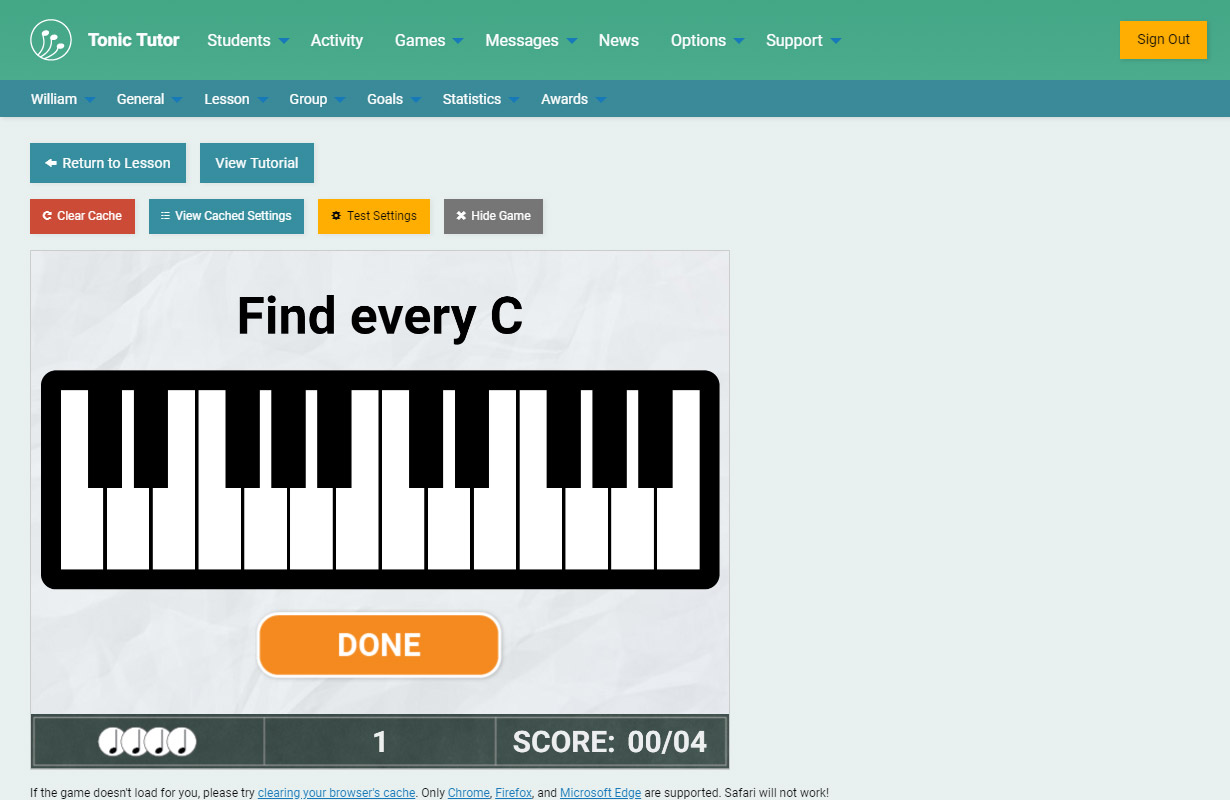
Another really useful feature on the settings page is the ability to test the game settings. Use the Test Settings button at the top of the page to load the game and test it out. Tweak the settings then refresh the page until you get the settings just the way you want them!
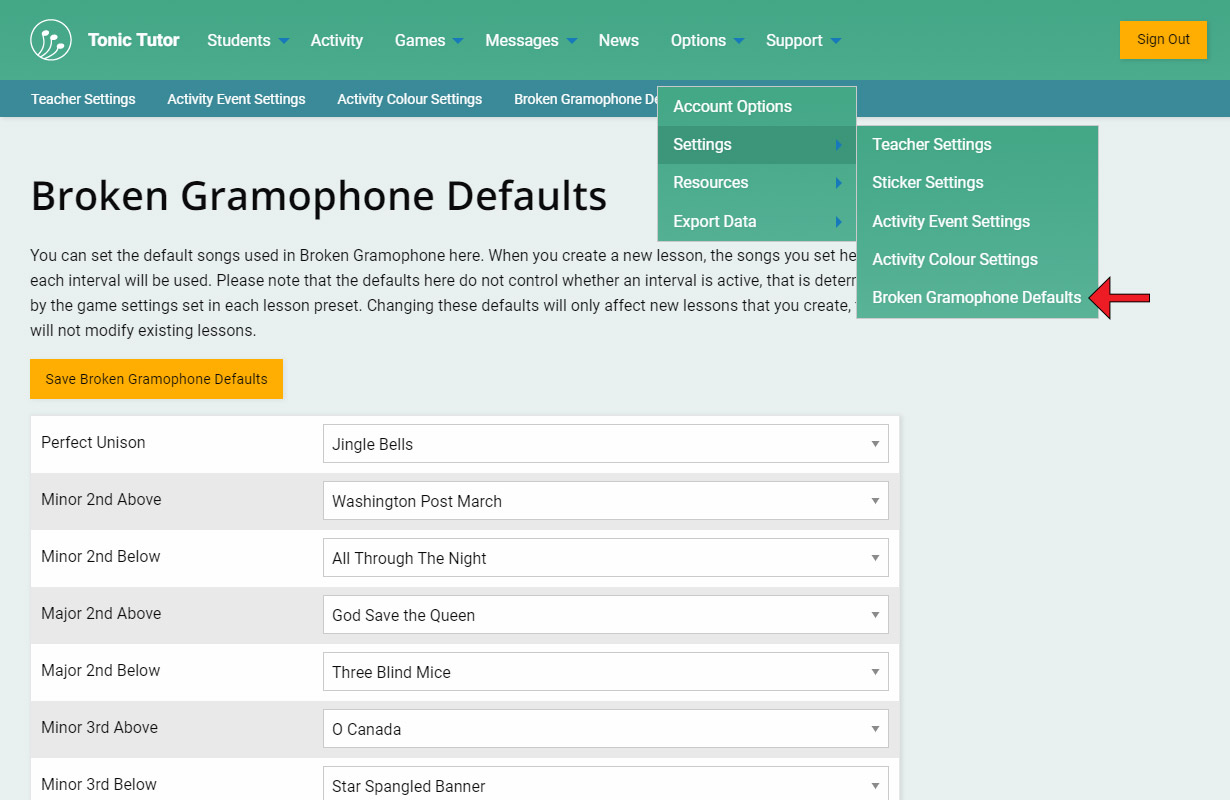
The game Broken Gramophone has a separate settings page where you can set the defaults for each interval. The path to the page in the main menu is Options>Settings>Broken Gramophone Defaults. It's important to note that this page has a button you need to use to save the changes you make to the drop-down menus.
We took a look at the Refresh Cache which resets the snapshot of the entire lesson in the Edit Lessons tutorial, but you can also refresh an individual game's cache without affecting the rest of games in the lesson using the Refresh Cache button on the Game Settings page. The View Cached Settings button also works exacly the same as the cache icon on the Edit Lessons page, it's there for your reference so that you know if there's a different between the current settings and the cached settings used in the student or groups active lesson.
It's as simple as that. The amount of control you have gives you a lot of flexibility, but it's only there if you want it.
View the next tutorial: Lesson Changes