1/9
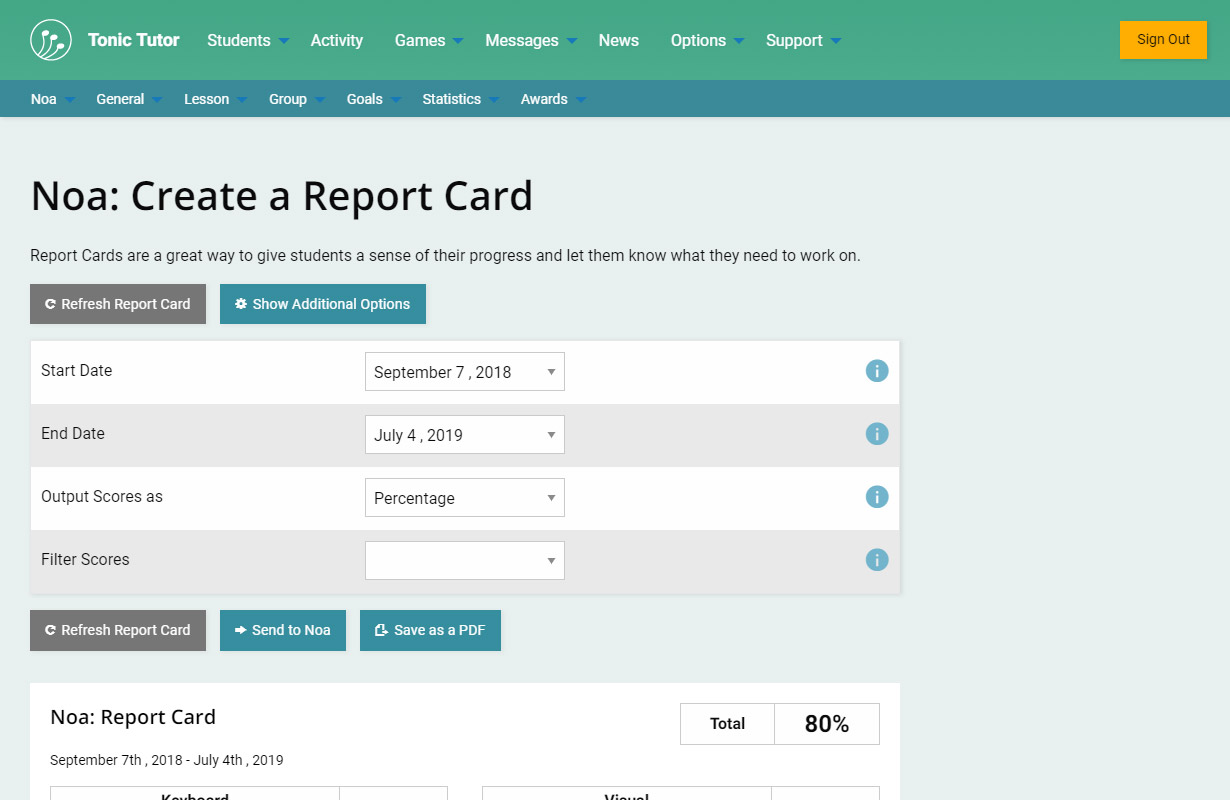
Report Cards have a lot of options that give you control over what information is displayed, but most of it is optional and hidden by default. Let's start with the options that are required.
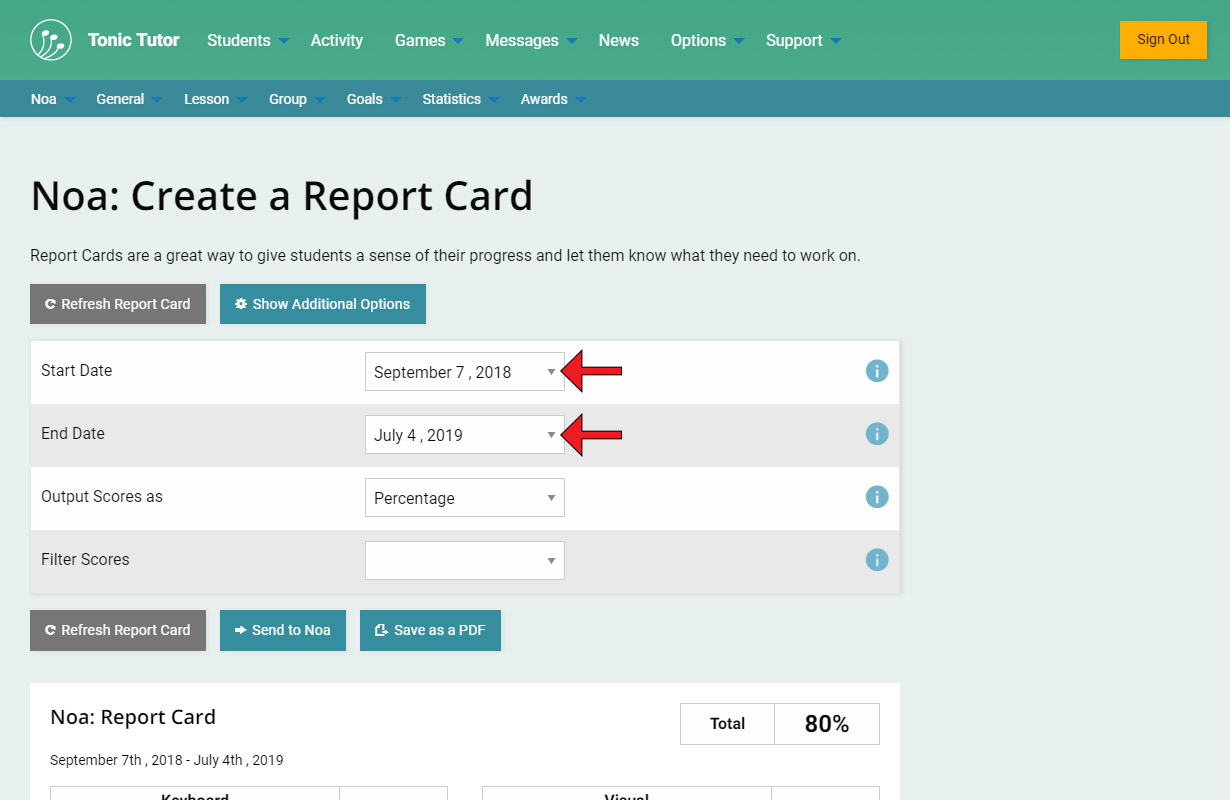
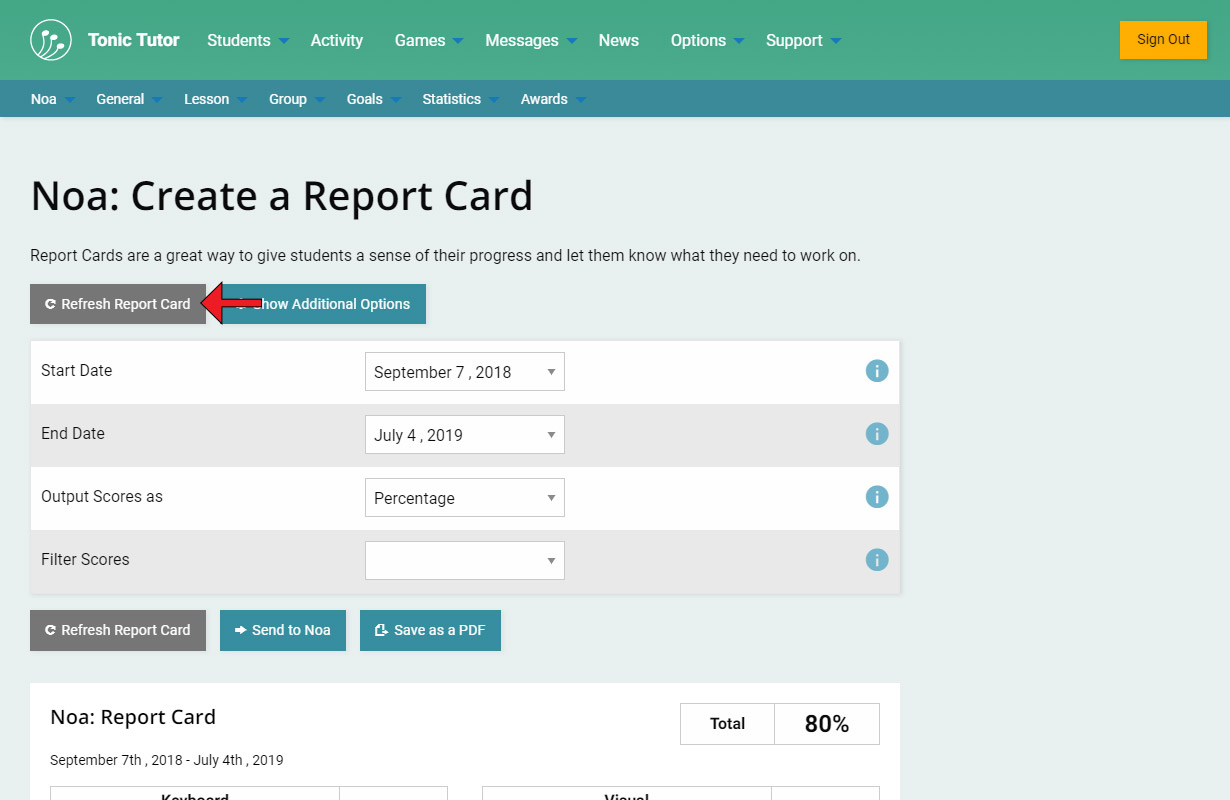
Lets start with the start and end dates which you can select using the first two drop-down menus. These allow you to limit the results used to calculate the information displayed in the report card. If a student has been using Tonic Tutor for more than a year, you'll see an additional drop-down menu you can use to select the year you want to pull lesson results from. You can find out how lesson years work in the What are Lesson Years? tutorial.
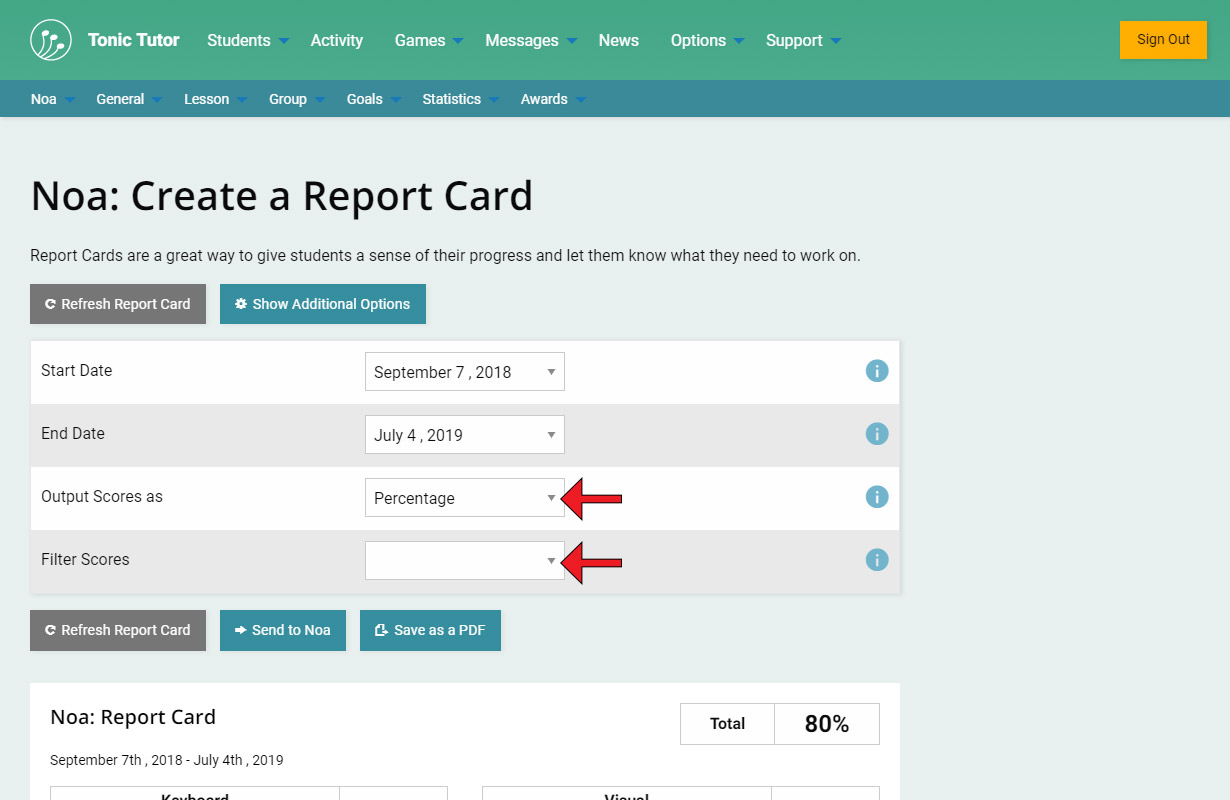
The last two required options determine how the scores are displayed. The Output Scores as drop-down menu allows you to output scores as a percentage or a letter grade. The Filter Scores drop-down menu allows you to filter out scores below a certain threshold. We want to give students an idea of their progress, but there's no sense in discouraging them. This gives you fine-grained control to strategically emphasize the positive. If nothing is selected in that menu, no scores will be filtered out.
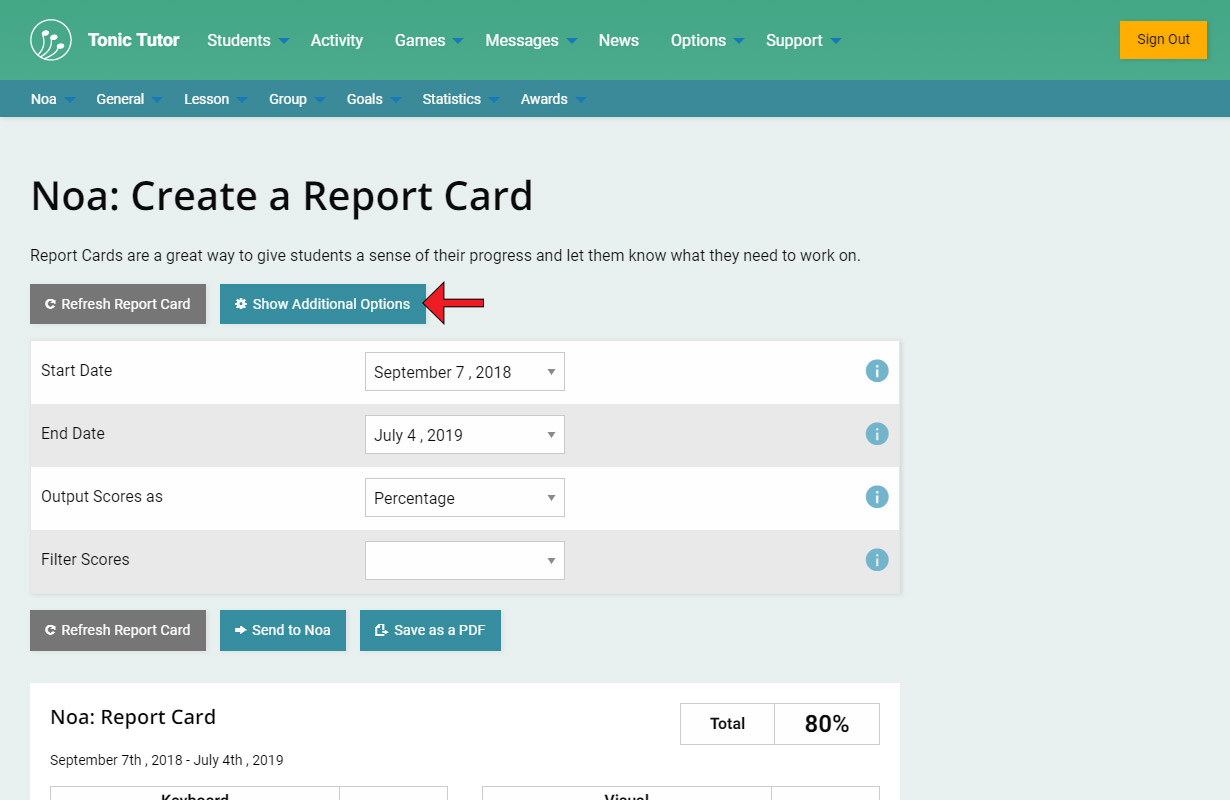
Now let's go over the optional settings. By default, they're hidden, so you'll need to use the Show Additional Options button to view them. You can select the games that are included in the report card (by default all of them are included if results exist), choose a sticker to display on the report card, or type in a short message of encouragement that will be included.
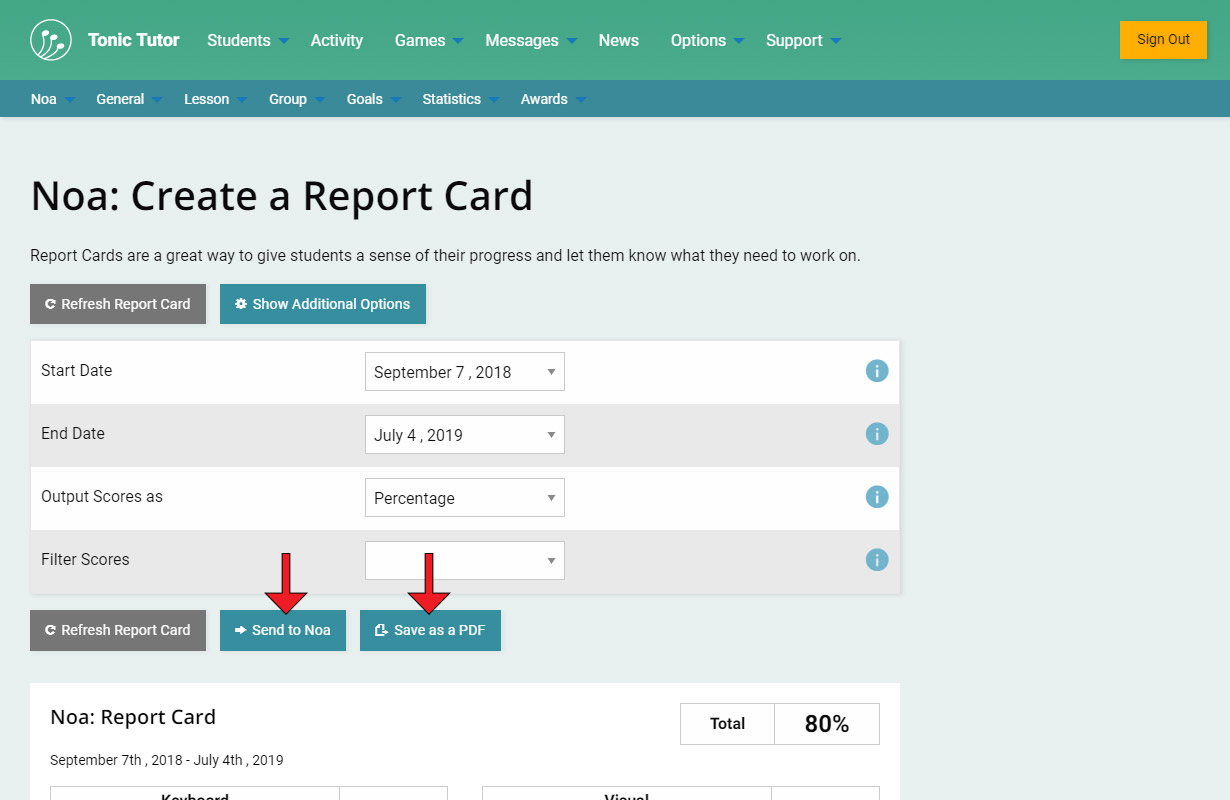
At the bottom of the page below the options, you can see a preview of what the report card will look like. Anytime you change any of the settings we've just gone over, you'll need to use one of the Refresh Report Card buttons to update the preview.
Once you've fine-tuned things to your satisfaction, you have two options: you can send the report card to the student so that it shows up in their account, or you can export it as a PDF. Or you can do both!
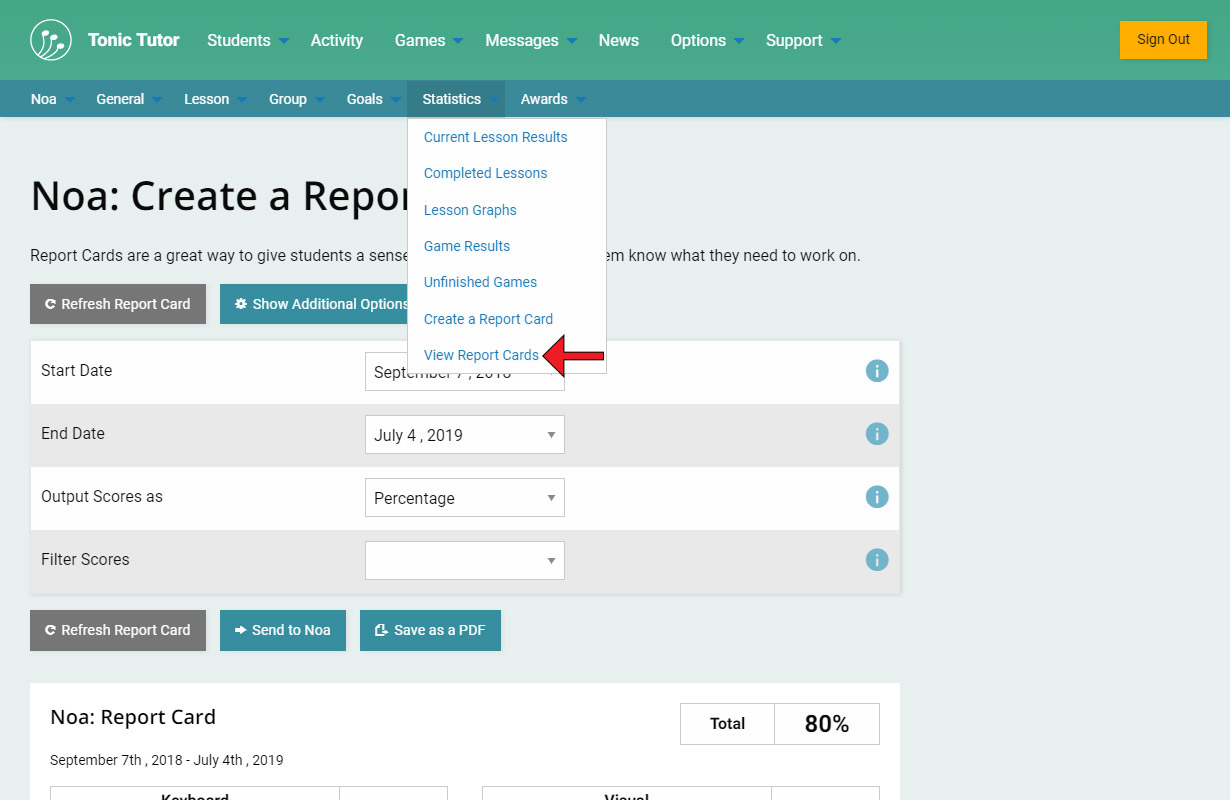
There's one final option in the Statistics menu to go over: View Report Cards. This is where you can view all of the report cards you've sent to a student.
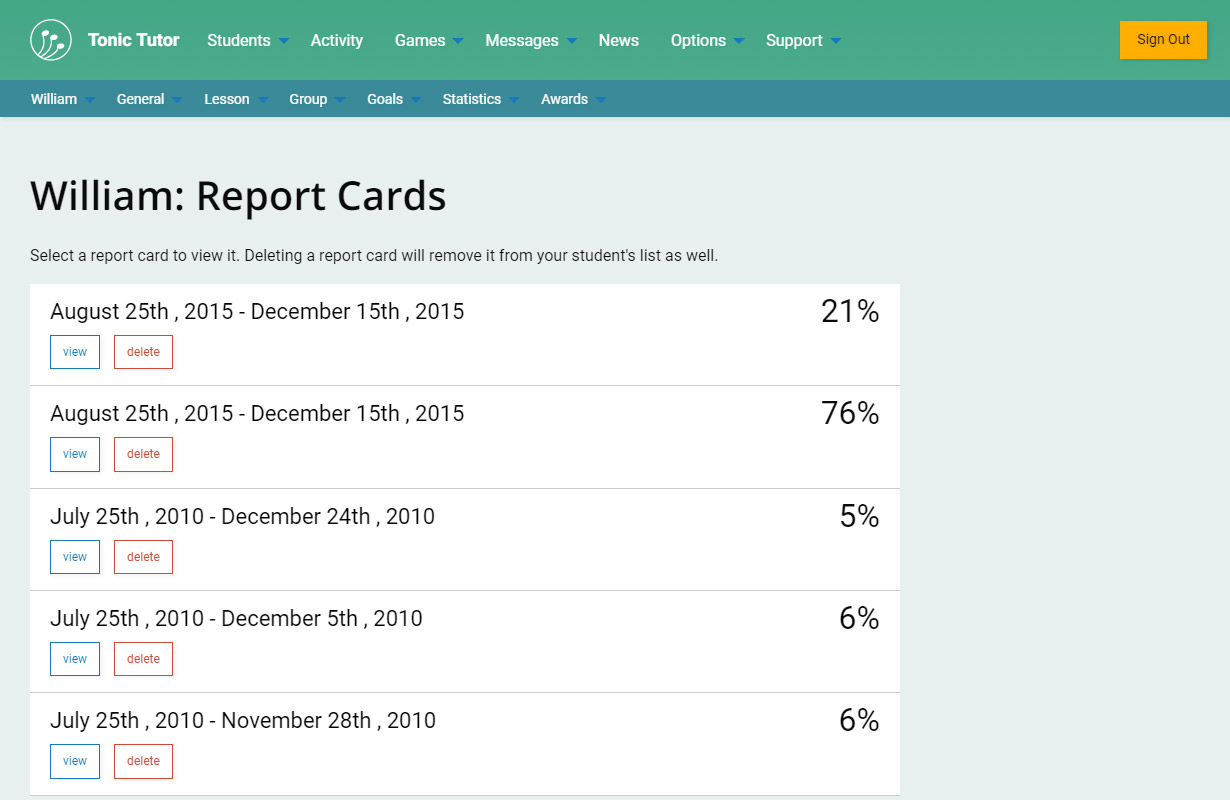
If any report cards exist, you can see them listed with the start and end date and the overall score. Using the view button will show the same thing you saw in the preview when you created the report card, and the delete button will remove the report card permanently from both your account and the student's account.
The covers everything you need to know about Statistics and what you have access to in your account. What about a student account? What do they see? We'll give you a quick overview of that in the next tutorial.
View the next tutorial: What Students See