1/8
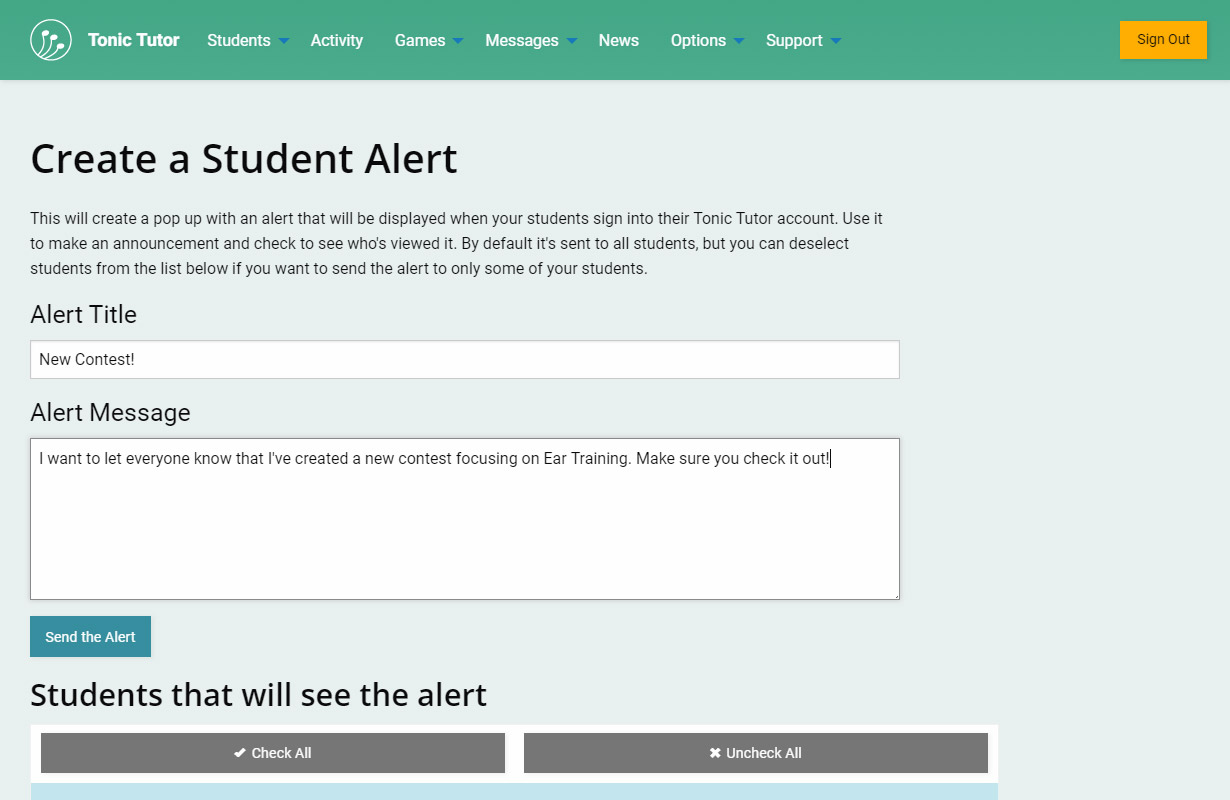
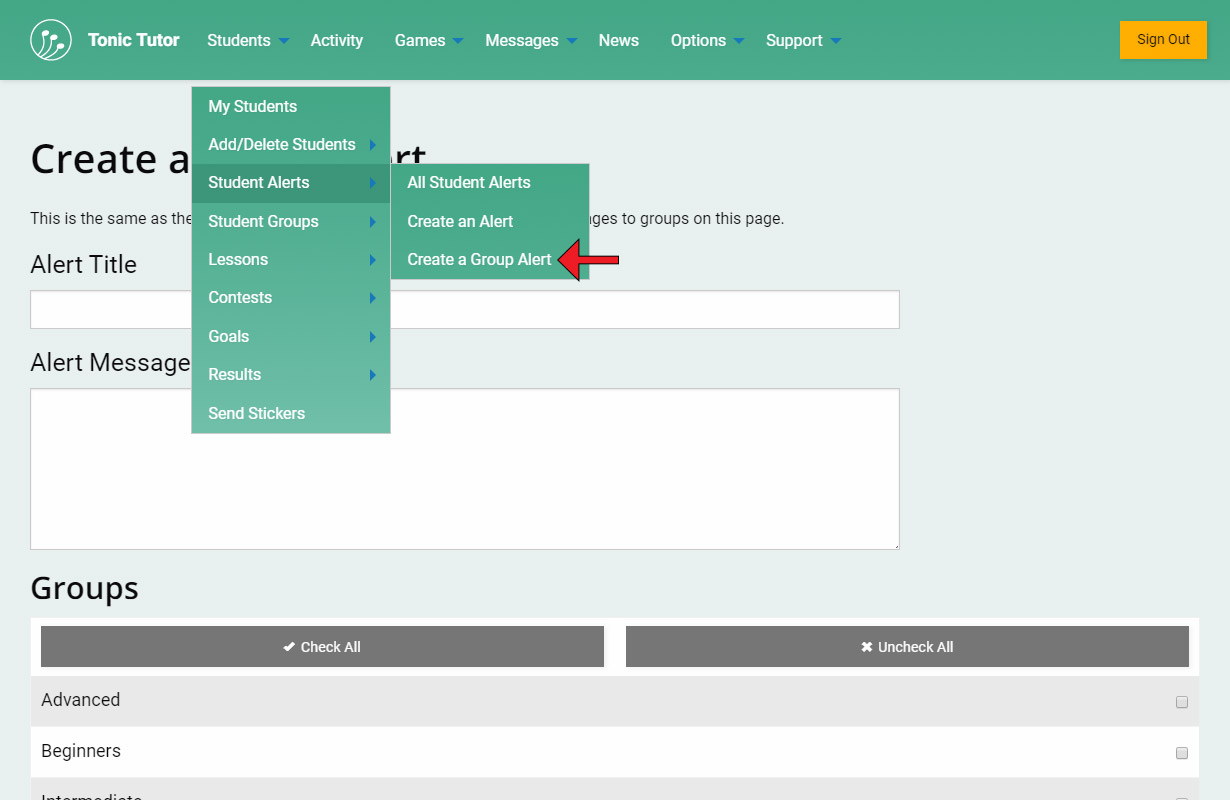
Tonic Tutor has a messaging feature which you can use to communicate with your students. There's another feature called Student Alerts that allow you to send a message that will pop-up when a student signs into their Tonic Tutor account. You can create an alert using the Students>Student Alerts>Create an Alert link in the main menu.
You'll need to enter a title and a message that you want your students to see. The advantage of an alert is that student's can't easily ignore it: it displays automatically, so it's hard to miss.
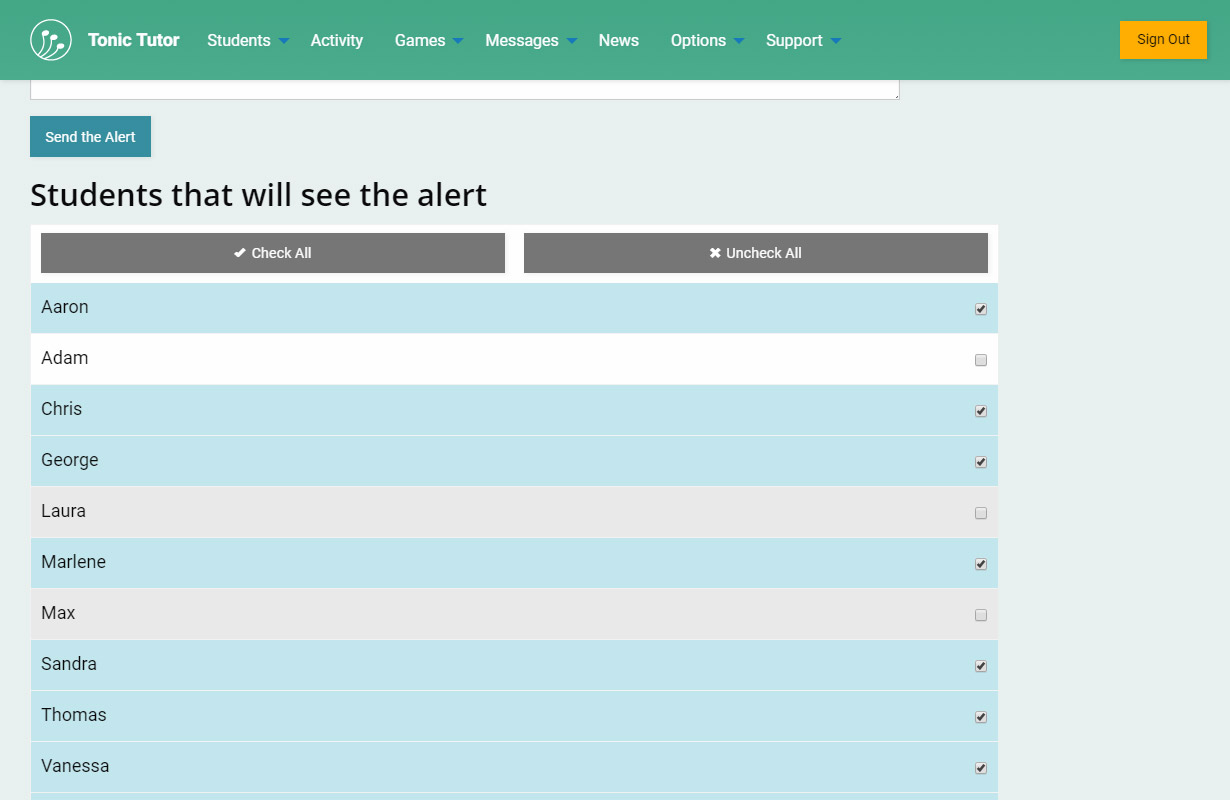
By default, an alert will be sent to all of your students, but you do have the option to select specific students if you want to target the alert. Once you've entered a title and a message, use the Send the Alert button to instantly send the alert.
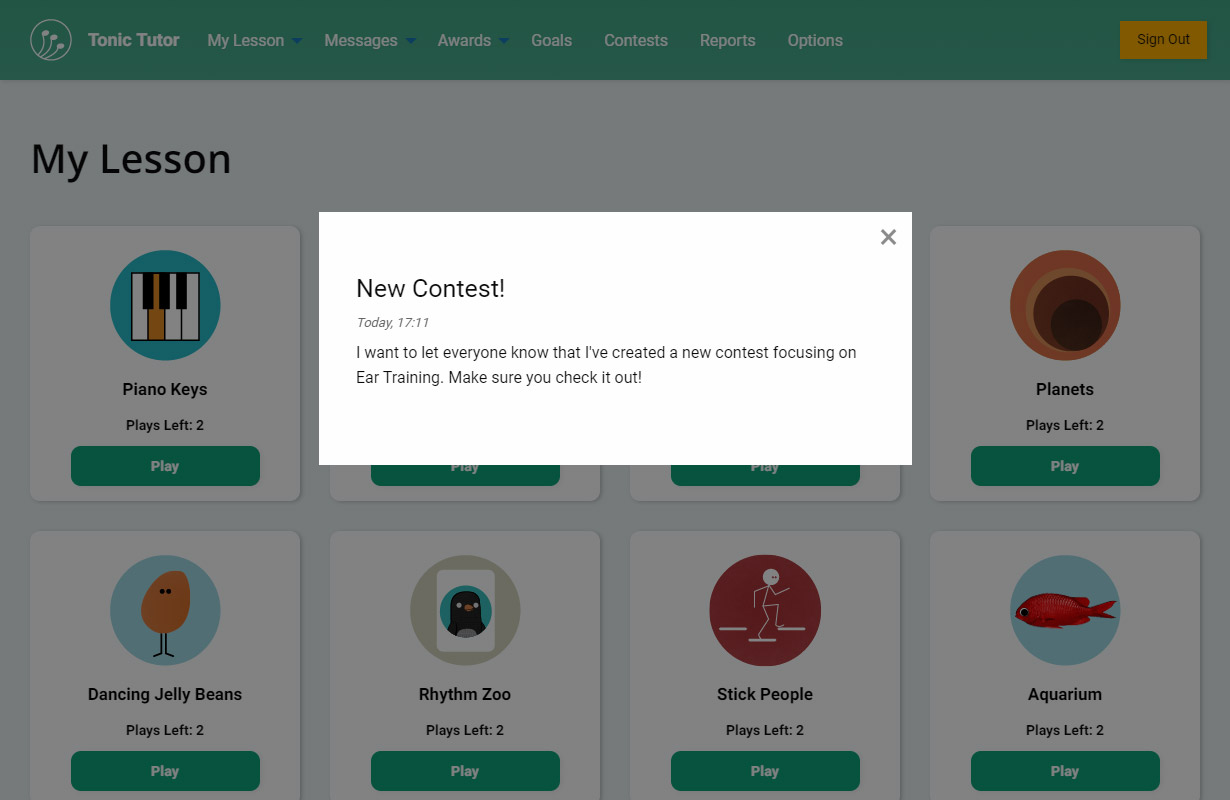
This is what the alert will look like when a student signs into their account. If you've sent multiple alerts, they'll appear at once. Once a student has viewed an alert, it won't reappear. Also, if they don't sign into their account, they won't see the alert.
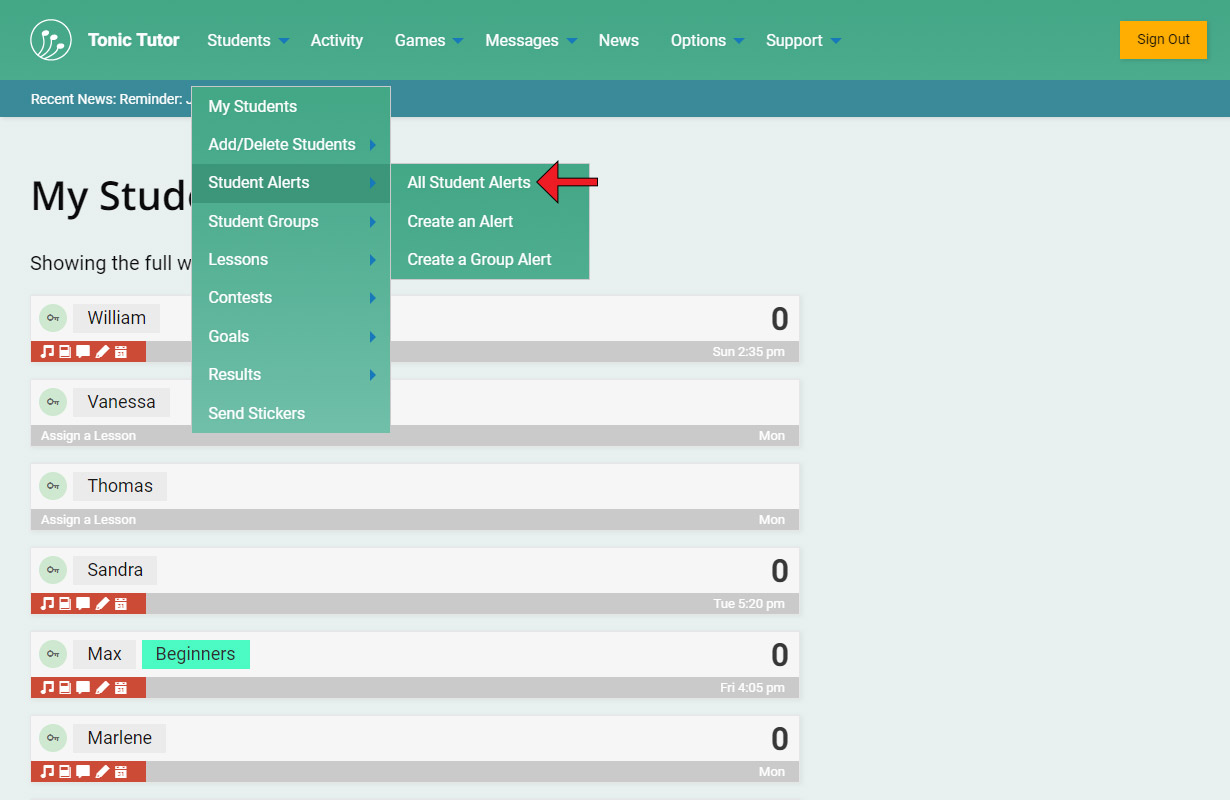
You can see all of the alerts you've sent using the Students>Student Alerts>All Student Alerts link in the main menu.
You can get a quick overview on this page of how many students have seen the alert (along with the total number of students you sent the alert to). If you have a lot of alerts, you can use the input to filter using keywords. Only titles are displayed, but the filter searches through both the title and the message. You can't edit an alert once it's been sent out, but if you delete it, it will no longer pop-up for students.
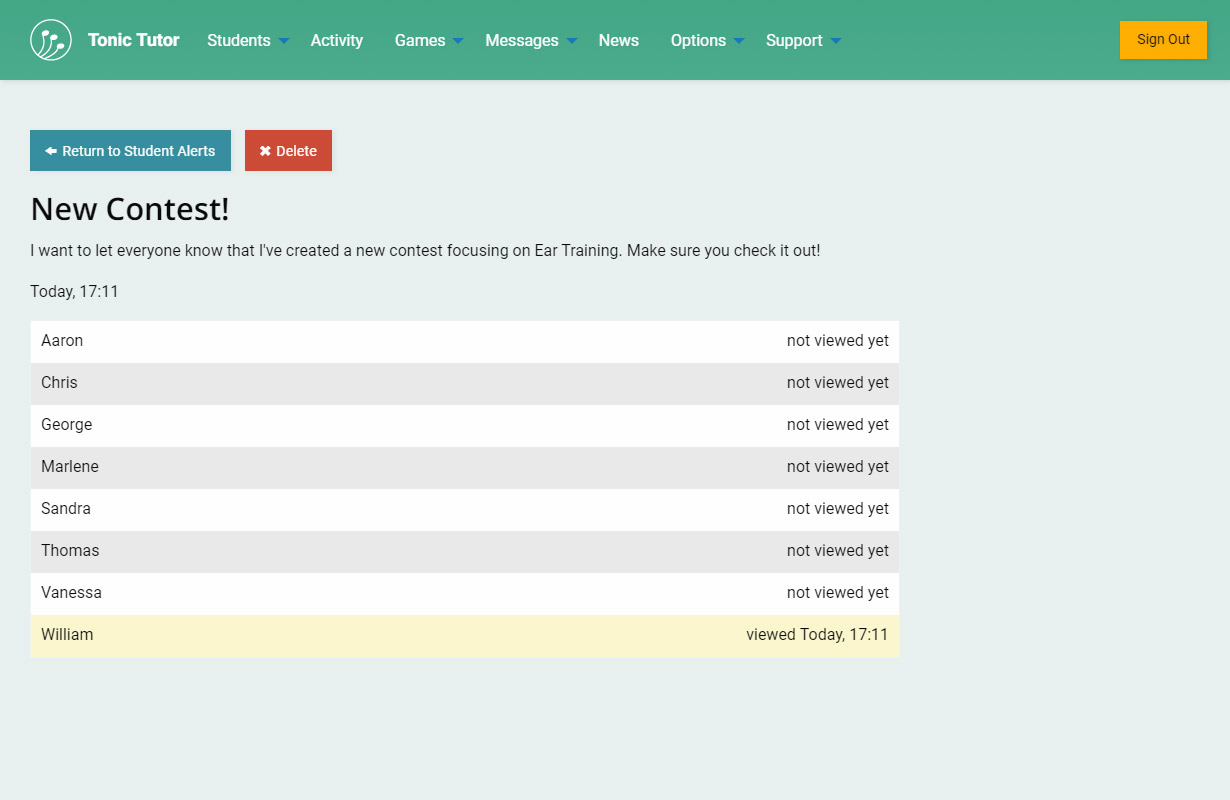
You can use the view button to see a more detailed list of which students have seen the alert, including the date and time they saw it.
There's also the option to send an alert to groups instead of individual students. It works the same, but it makes it a bit easier to target students in a group without having to try and remember which students are in a group. If you've created a group but it doesn't have any students assigned to it, it won't appear as an option (it's hard to show an alert to students that don't exist!).
View the next tutorial: The Activity Overview