
1/16
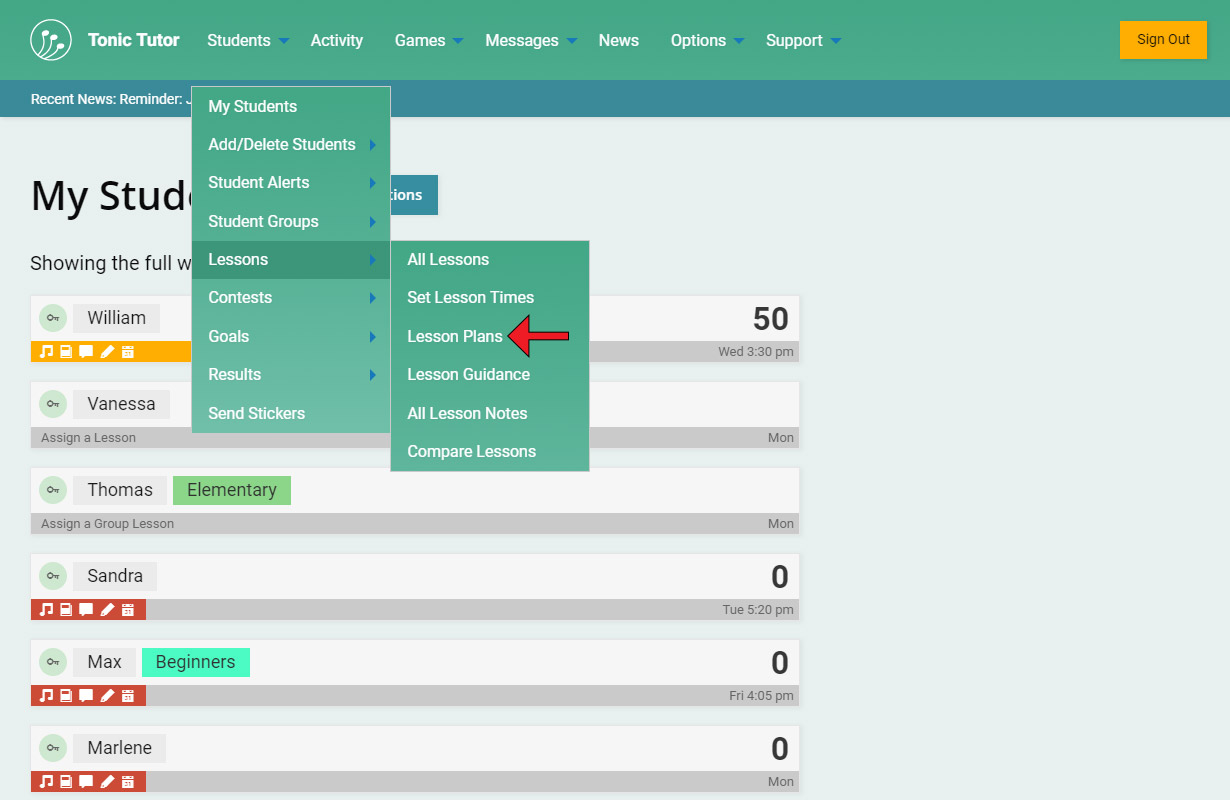
Lesson Plans allow you to do some strategic planning on Tonic Tutor ahead of time so that you don't need to spend a lot of time each week modifying your student and group lessons. You can queue up multiple lessons and focus on the results with the option to tweak and modify your lesson plan at any point. There's a couple of different ways to create lesson plans, let's start with the page that will show us all of our lesson plans using the Students>Lessons>Lesson Plans link in the main menu.
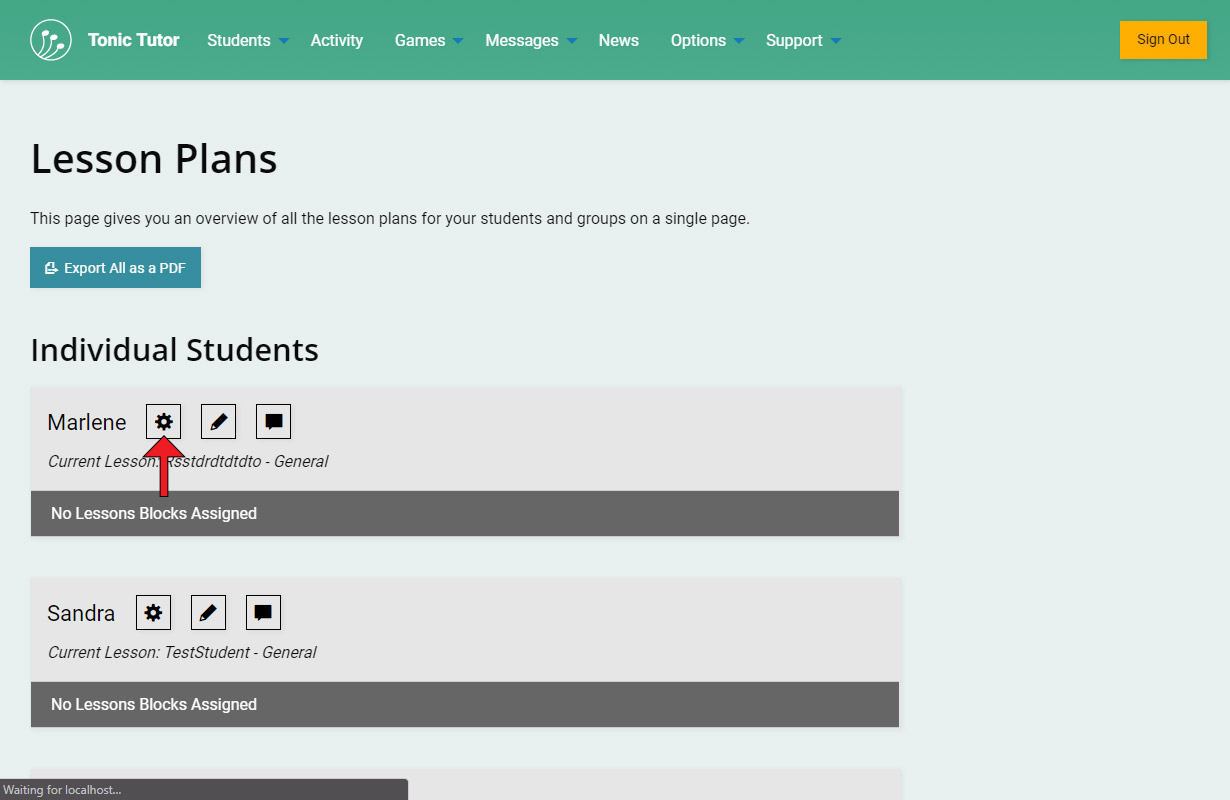
On the Lesson Plans page, you'll find a list of the students and groups you've added. You'll probably notice that if a student belongs to a group, they're not listed in the Individual Students section. That's because lesson plans are tightly coupled with lessons: since the students in a group share a lesson that's common to the group, they also share a lesson plan. We'll focus on the individual students in this tutorial, but we go over group lesson plans in the Group Lesson Plans & Guidance tutorial. Since none of our students have a lesson plan yet, let's create one using the Edit Lesson Plan button (which looks like a gear).
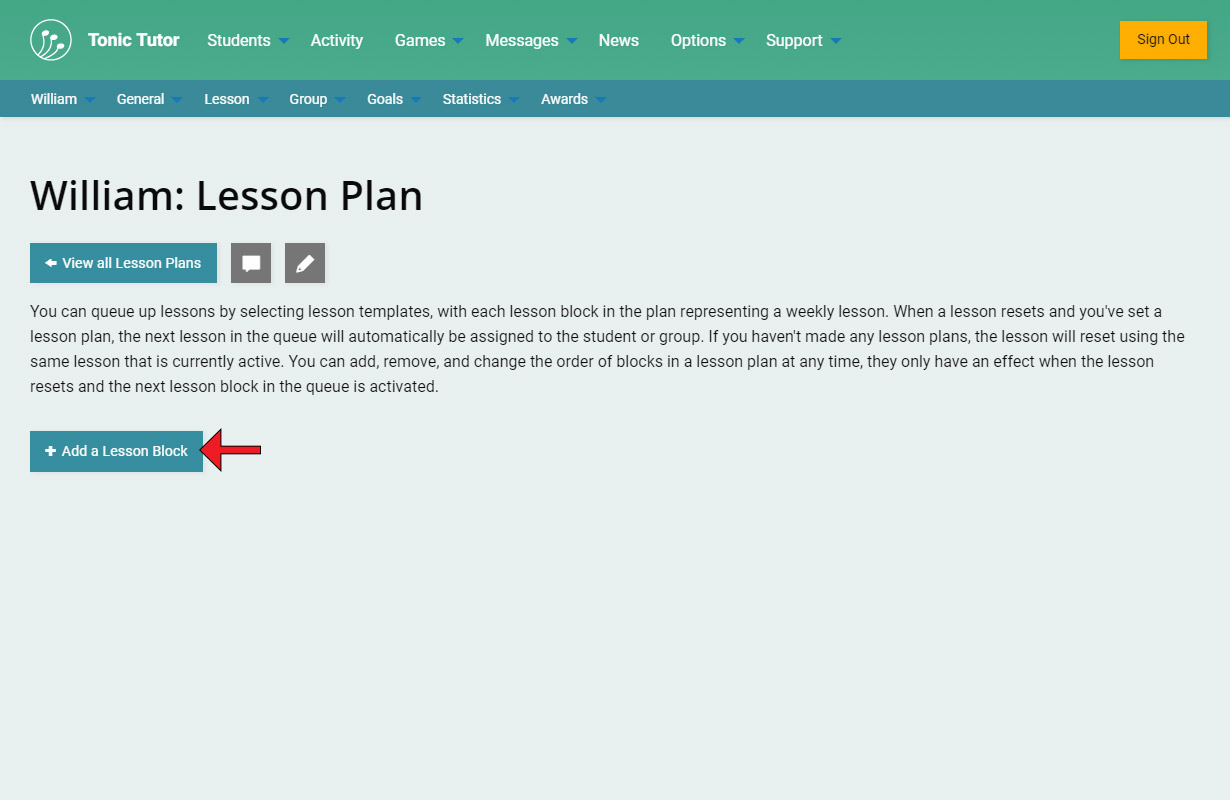
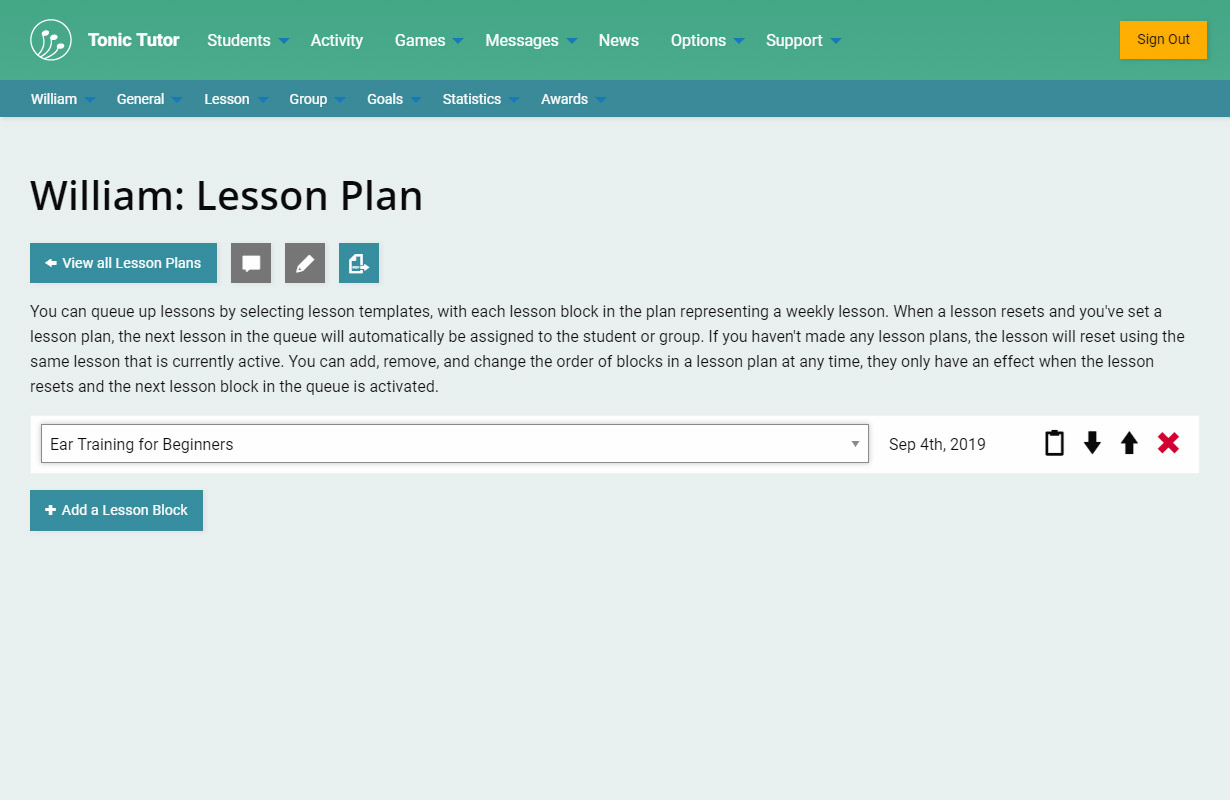
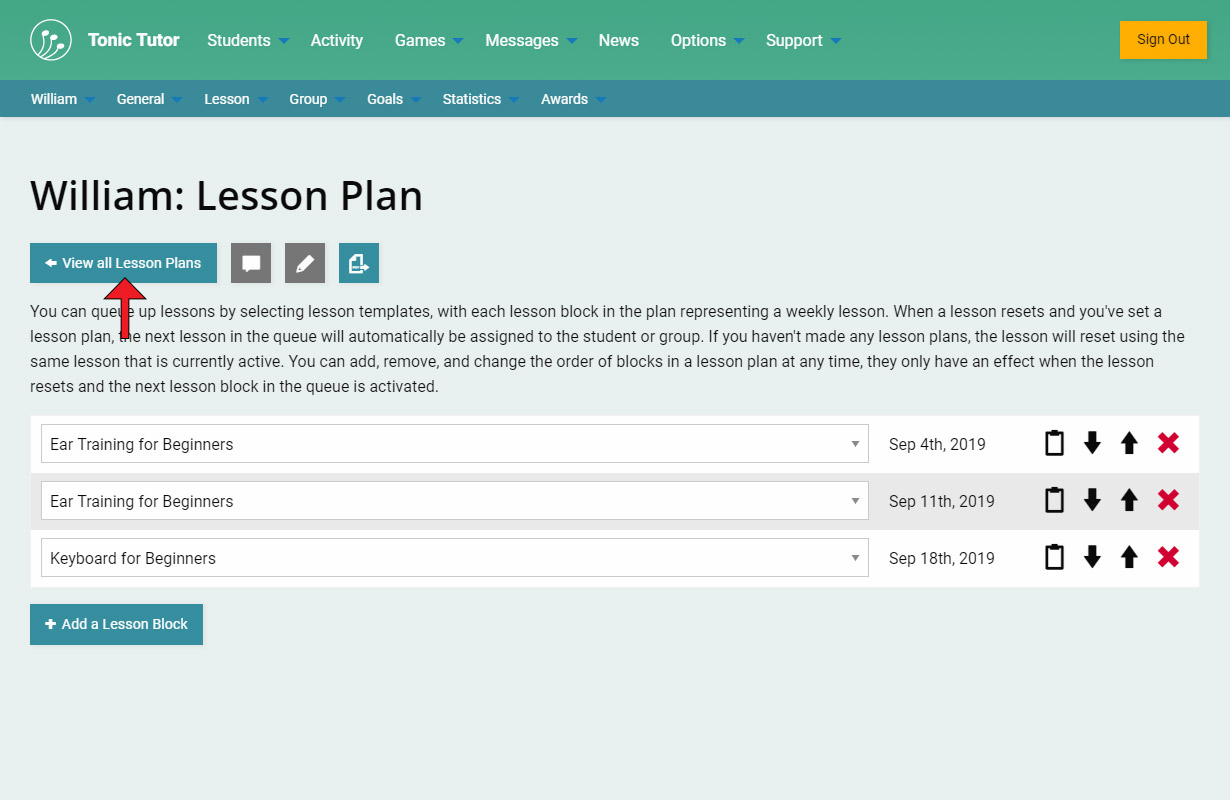
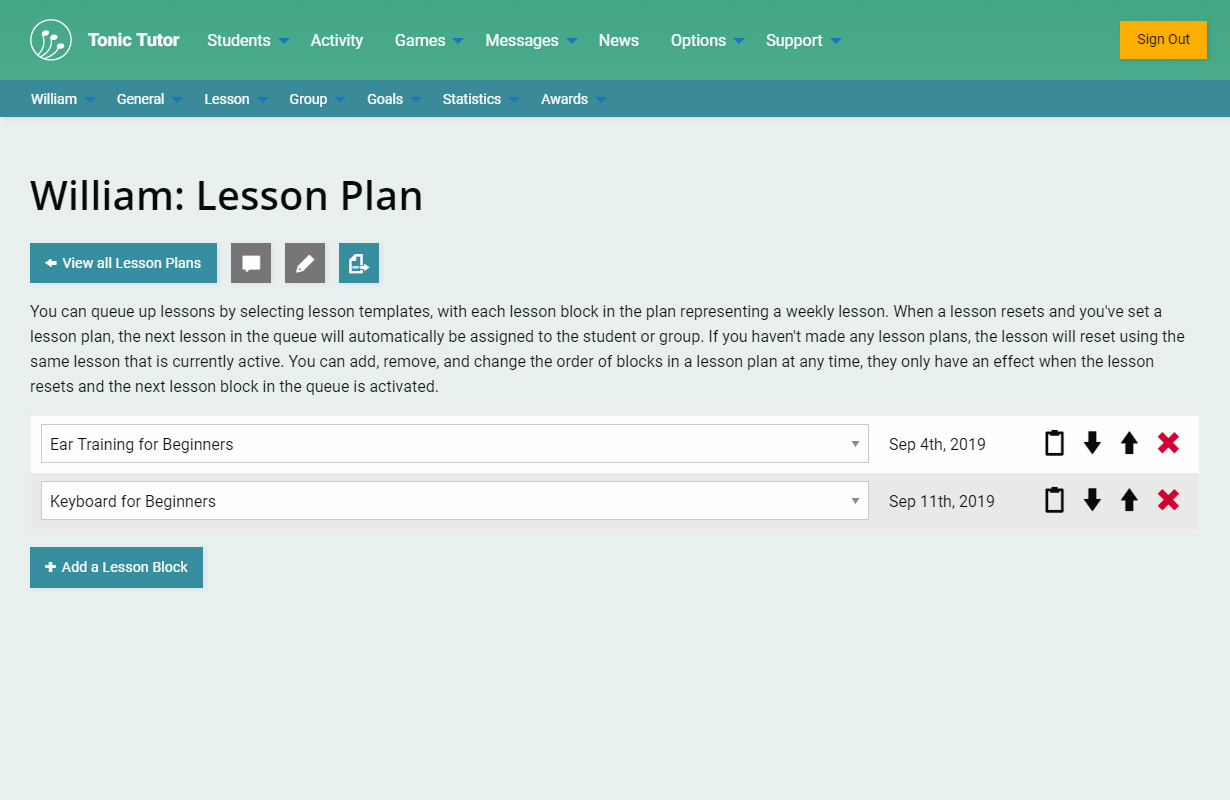
This Lesson Plan looks pretty empty, but in a matter of moments we can conjure up weeks and months worth of lessons. If a student or group doesn't have any active Lesson Blocks in their lesson plan, you'll need to use the Add a Lesson Block to add one.
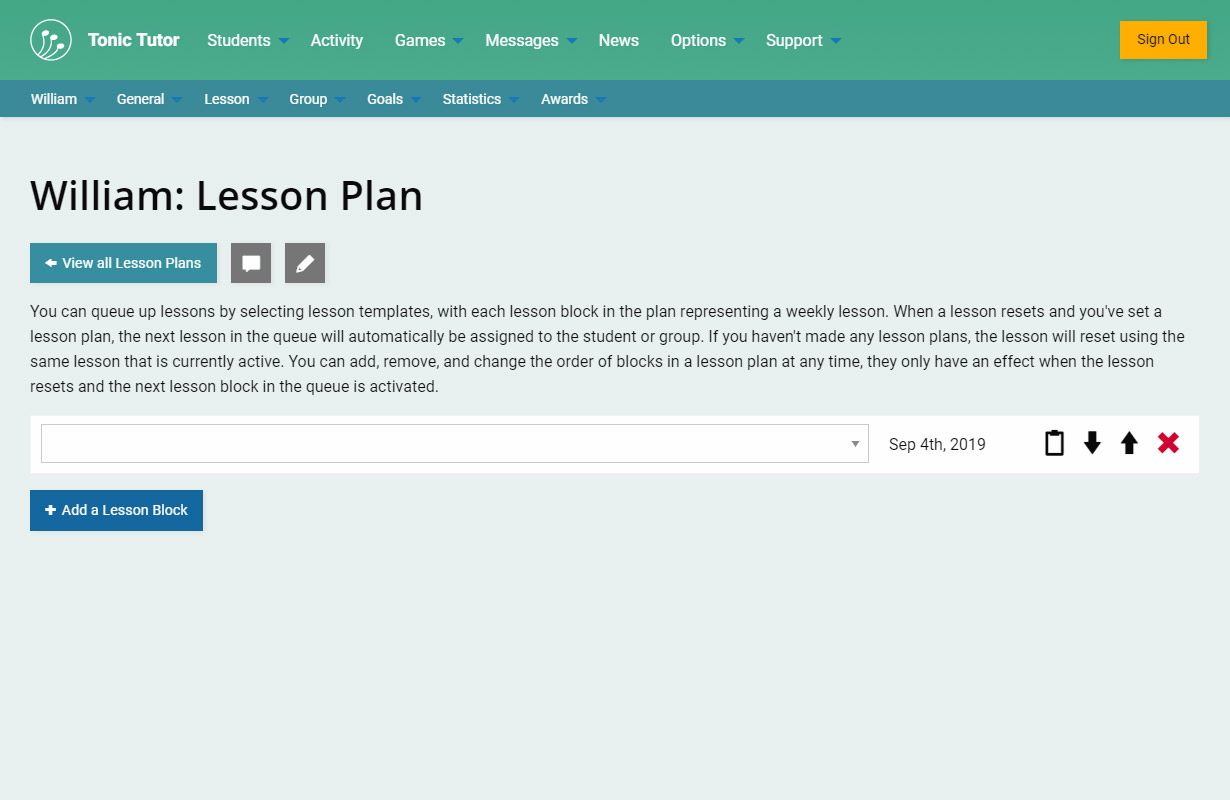
There it is, our first active lesson plan! There's a drop-down menu you can use to select one of your custom templates or a Tonic Tutor template. Next to the drop-down is the date that the lesson will become active (which is based on the student's lesson time, if you change that at any point, this date will also change). Lesson plans work best if you spend some time creating your own custom templates, which you can learn about in The Lesson Page & Custom Templates tutorial. If you spend some time upfront creating the lessons you want your students to work through and slot them into a lesson plan, you'll save yourself a bunch of time each week.
It's important to note that until you select a template from the drop-down menu, the block isn't active, so let's do that now. I've selected one of the custom templates I created previously. Now what? I could leave it as is, and on the date displayed, the new lesson will become active, replacing the student's current lesson. I can also add more lesson blocks: there's no limit so you can queue up as many lessons as you'd like.
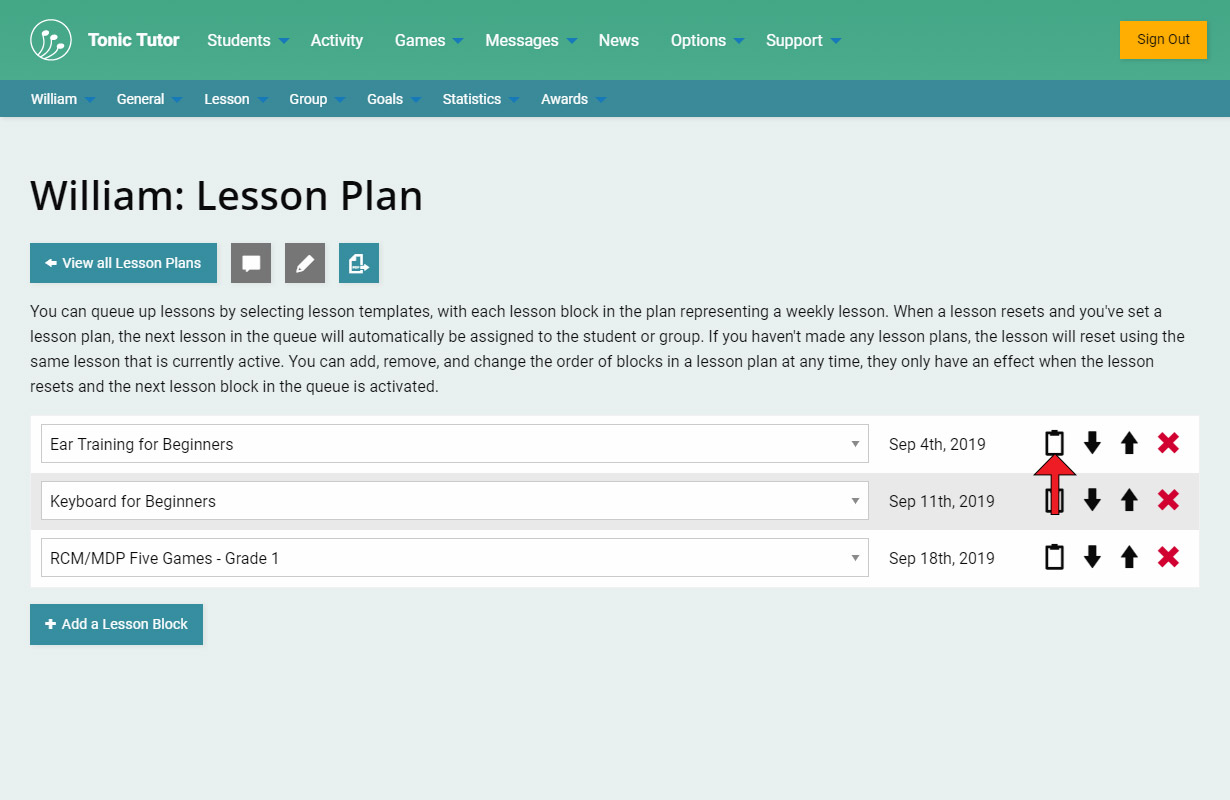
I've added a couple more lessons using the Add a Lesson Block button which always adds a new blank lesson block at the end of the list. What if I wanted this student to do a second week of ear training before moving onto Keyboard for Beginners? You can use the first icon (which looks like a clipboard) to copy a lesson and place it immediately after the block that you're copying. Let's try that now.
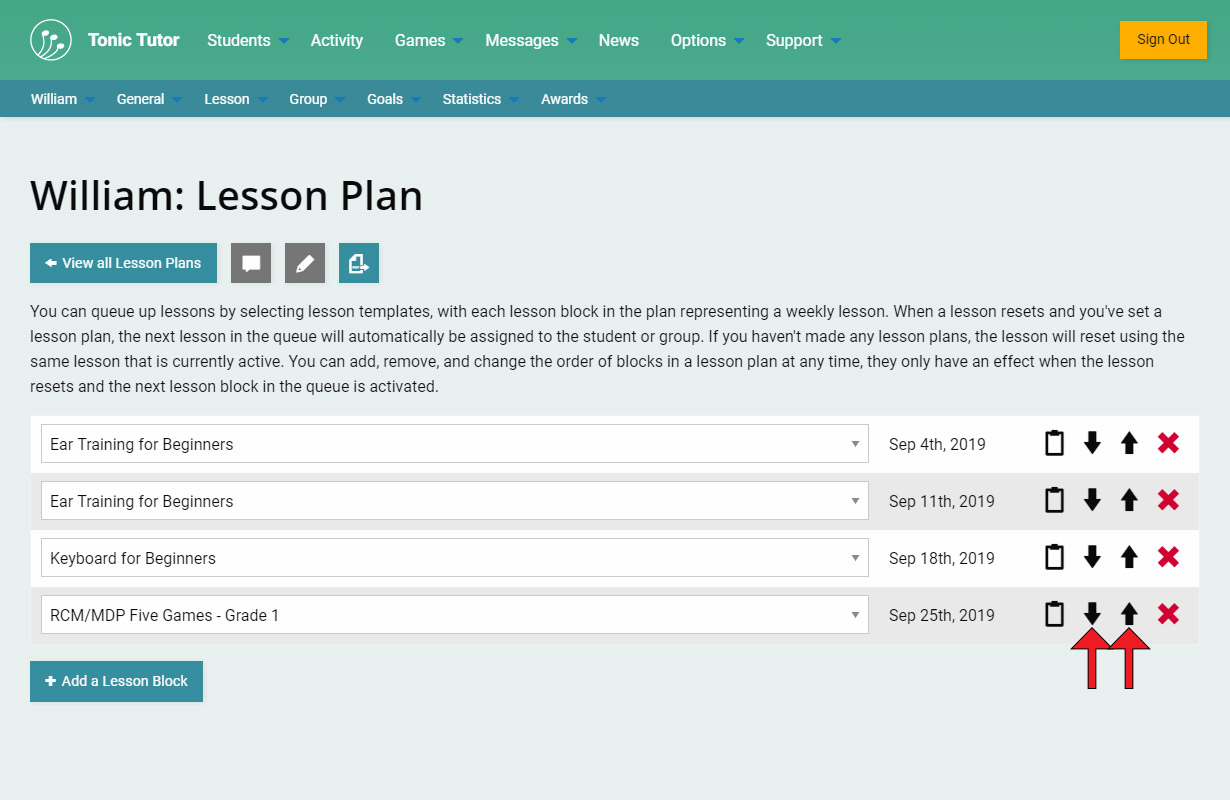
A new block is created which means the student will have that lesson for two weeks. I could use the copy icon to create a third week a week later if I decided the student needed a bit more work on ear training. It's really important to understand that anything you set in a lesson plan isn't set in stone, it only activates a new lesson whenever a lesson is reset, looking for the first lesson in the list, which means they're really flexible. Say I decided I wanted the student to start with the Five Games template and then move on to ear training and keyboard. You can use the arrow icons to move any of the lesson blocks up or down the list.
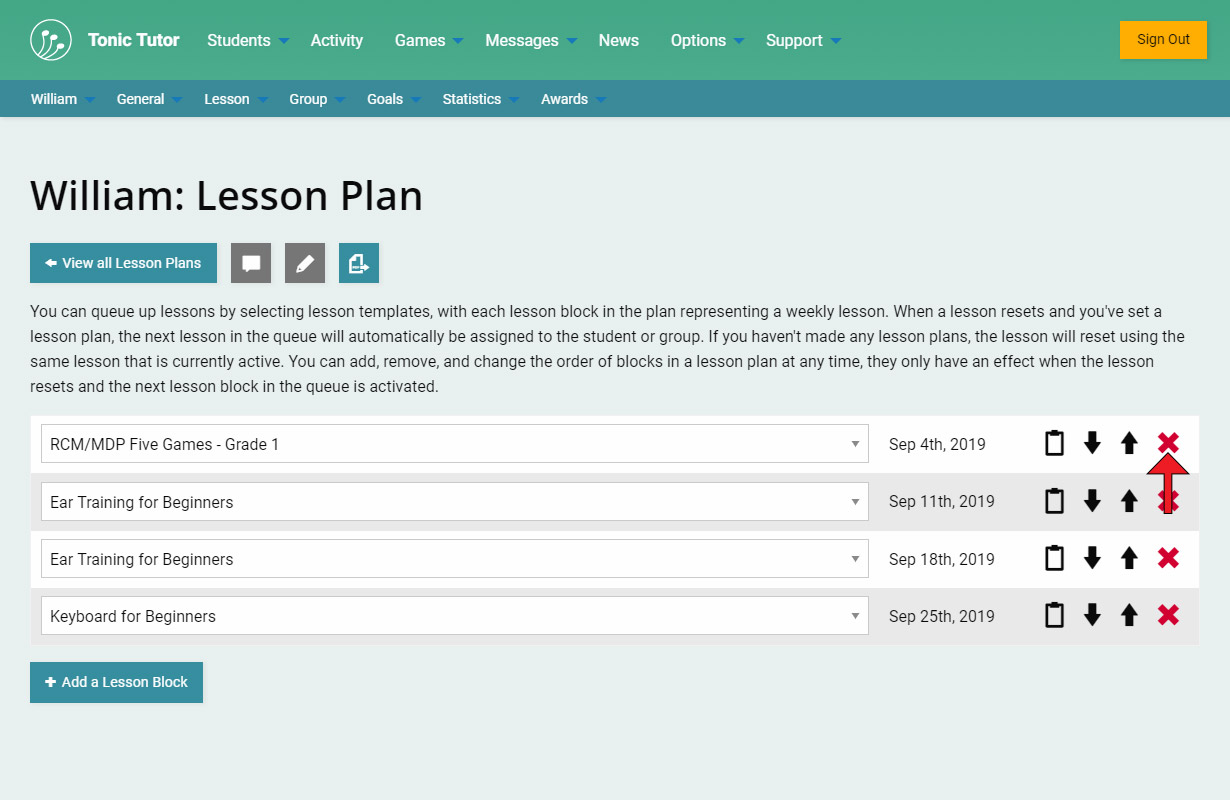
I used the arrow pointing up three times to move the Five Games template to the top of the lesson plan. You can see that as I make changes to the lesson plan, the date associated with each block is automatically updated to reflect its position in the list. I've decided I don't want the Five Games template, I want to get rid of it. You can remove any lesson block using the fourth icon that looks like a red X.
There, my lesson plan is complete! I could add a few more, but this is a good start: I'll watch the students progress over the next three weeks and make adjustments to their lesson plan depending on how well they're doing. Now that I've created my first lesson plan, let's go back to the Lesson Plans page and see what it looks like there.
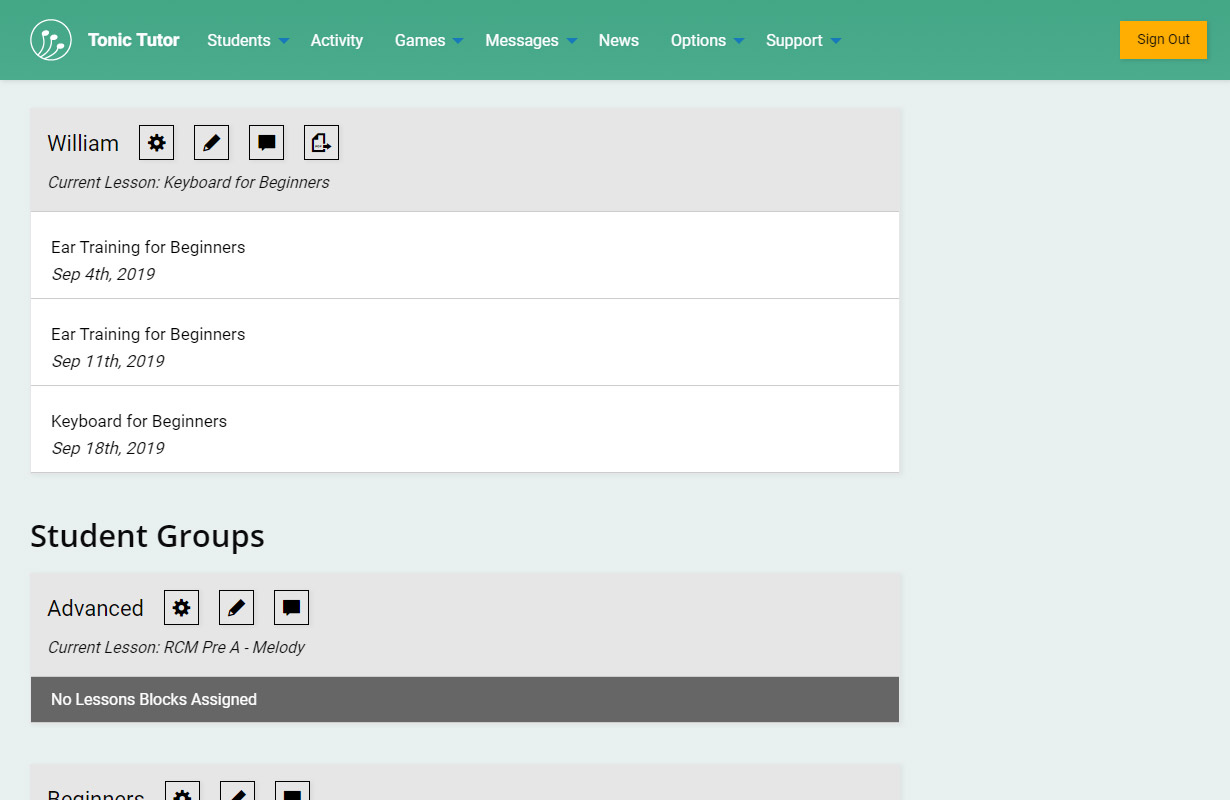
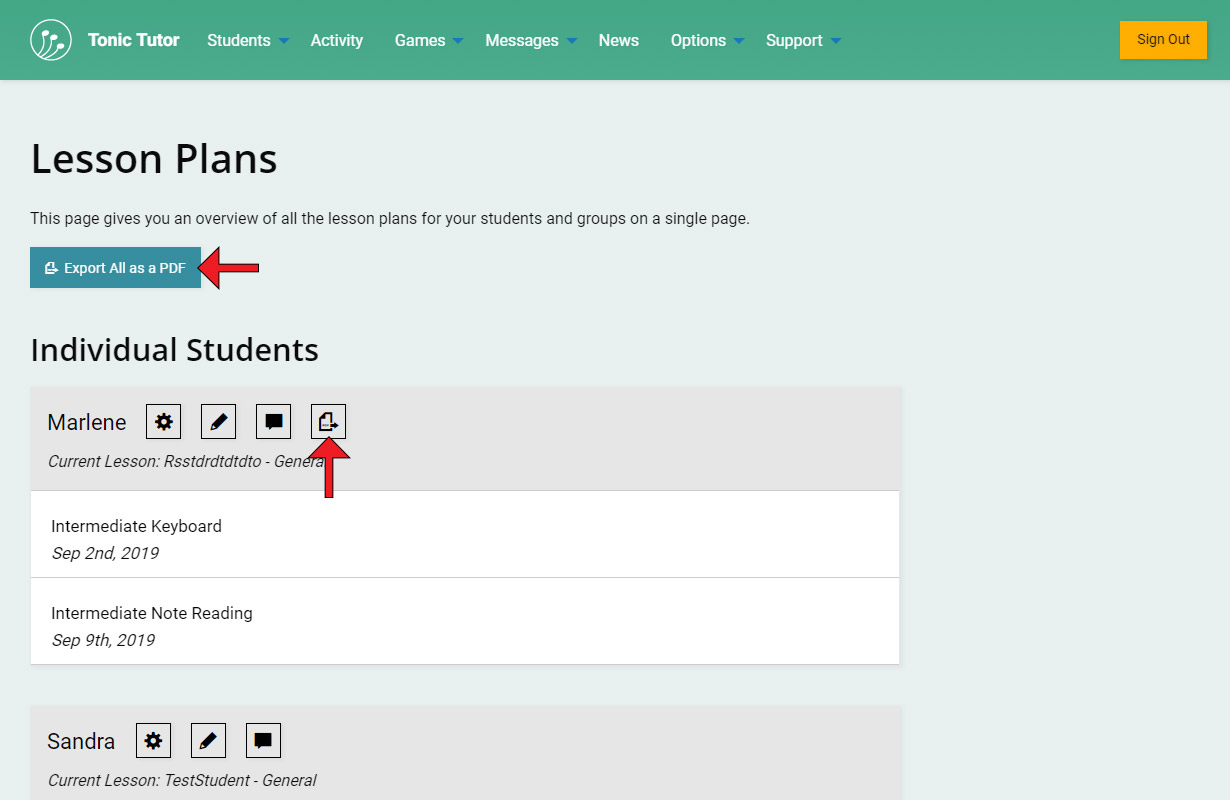
It essentially looks the same: three blocks with the dates the blocks will become active. This page with all of your lesson plans is a really useful way to get a quick overview of everything on one convenient page.
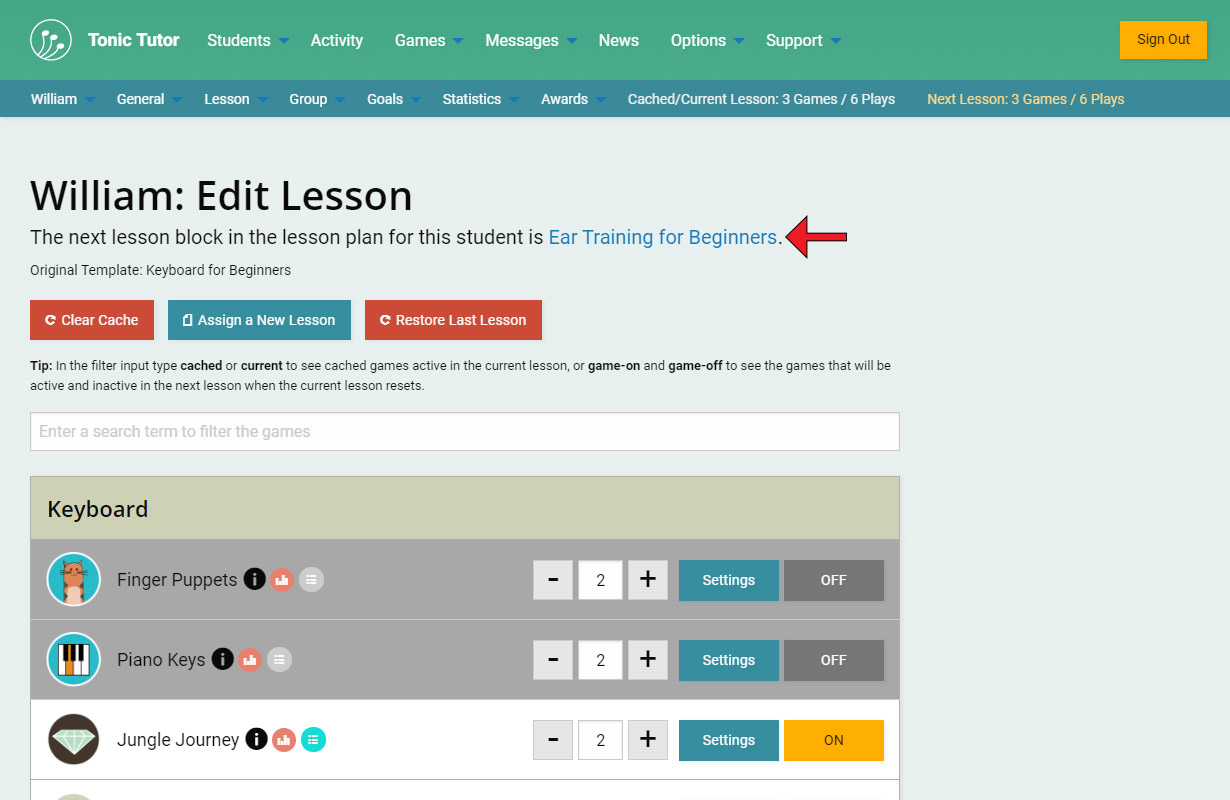
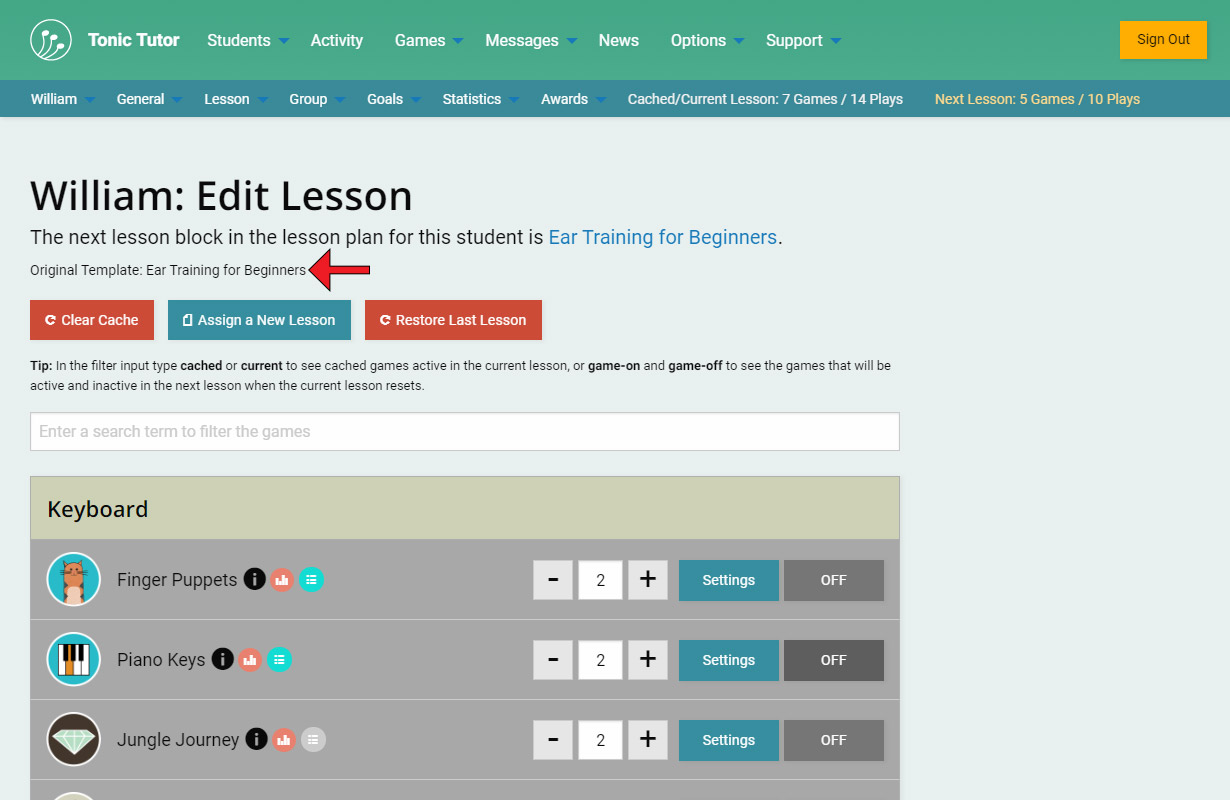
If a student or group has an active lesson plan, the next template queued up will be displayed on the Edit Lesson page. Selecting the name of the next template will take you to the Lesson Plan page where you can make any changes you'd like.
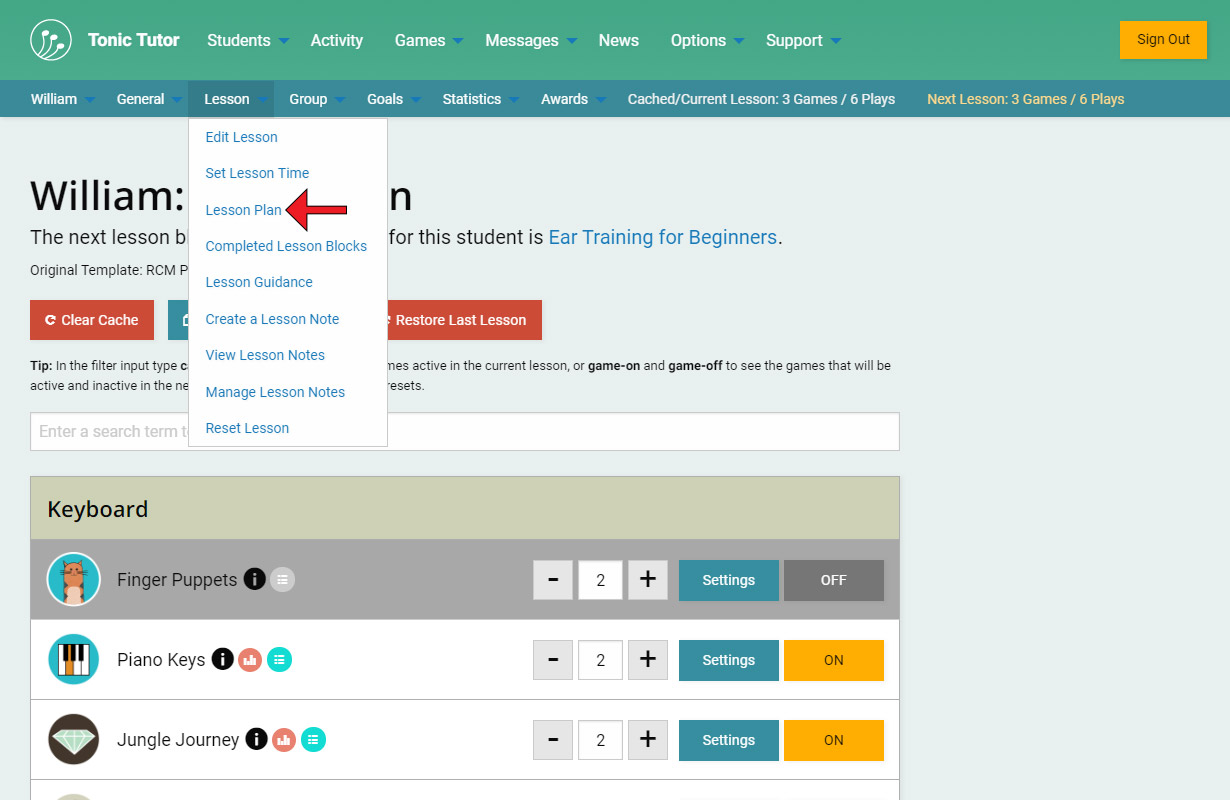
You can also access the Lesson Plans page for a student or group from the contextual menu under the Lesson sub-menu.
What happens when a lesson block becomes active? Let's say that time has progressed to the date that was listed on the first lesson block in the lesson plan I created. You can see on the Edit Lesson page that the lesson has been updated. If you wanted, you could make changes to a lesson after a lesson block has been activated, but it's important to keep in mind that those changes don't affect other blocks in the queue. You can see the current template is for ear training, and the next lesson block queued up uses the same template. If I modified the current lesson, it won't affect the next lesson block, so any changes I made would be lost when the next lesson block becomes active. You could also choose to assign a new template and refresh the cache, but the key thing is that if a lesson plan exists, the next lesson block queued up will override any changes you make. The lesson plan is supreme!
If I go to the Lesson Plan page, I see that the activated block has been removed and only two lesson blocks are left. The lesson plan is executed in order until all of the lesson blocks have been completed. You can always add more lesson blocks as you go, or remove them all so that no lesson plan is active: you have full control over it and can make changes you'd like at any point in time. If a student doesn't have a lesson plan, the existing lesson will be used when the lesson is reset without any changes. You can also manually assign a new lesson at any time you'd like and queue it up as the next lesson.
Another really cool feature: if a student or group has lesson blocks assigned to them in their lesson plan, you have the option to export the lesson plan as a PDF for your reference. This gives you the option to create a hard copy you can use without having to use the website.
On the main lesson plan page, you have the same option using the export button next to the student or groups name (it will only appear if the student or group has lesson blocks assigned to them in their lesson plan). There's also a button at the top of the page you can use to export all of your lesson plans in a single PDF document. We like to make things easy on Tonic Tutor, and we hope you find Lesson Plans a useful tool!
View the next tutorial: Completed Lesson Blocks