1/7
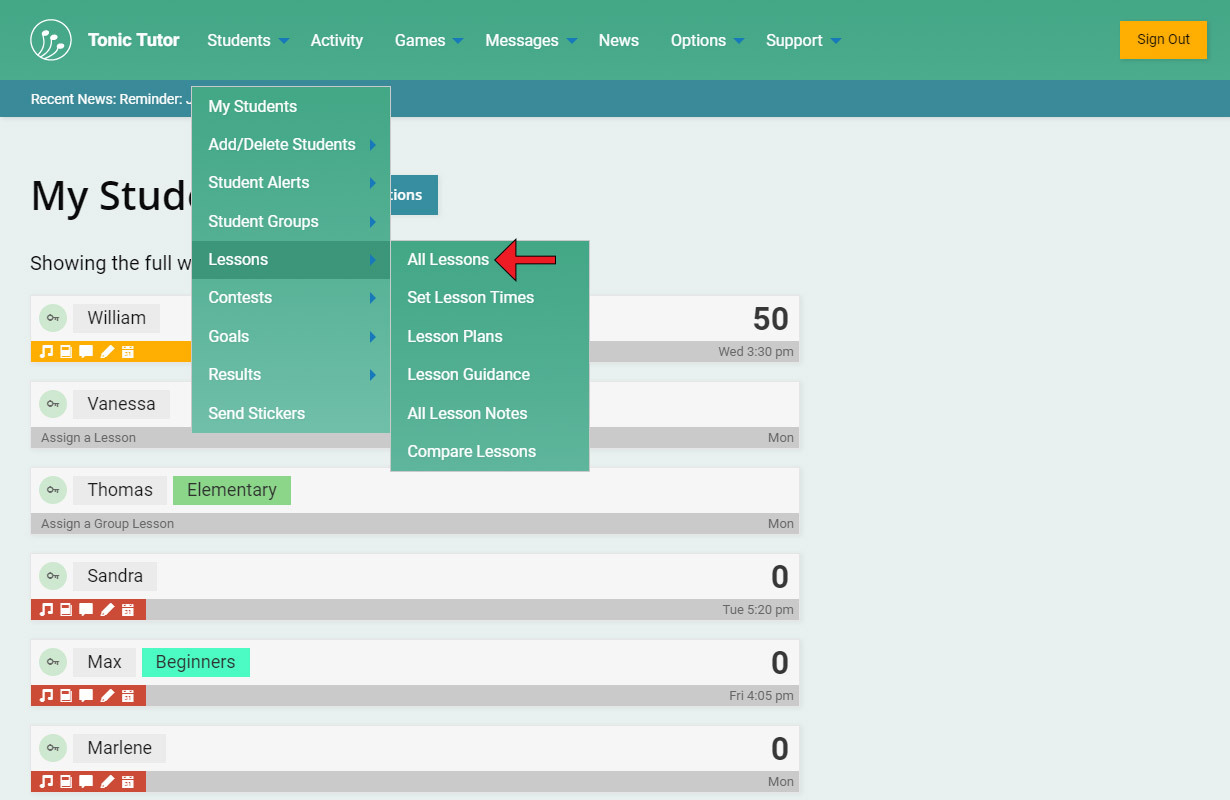
It's a little bit hidden, but there's a page you can use to view all of the lessons you've assigned along with an option to create custom lesson templates. To access that page, select Lessons>All Lessons link from the Students sub-menu in the main menu.
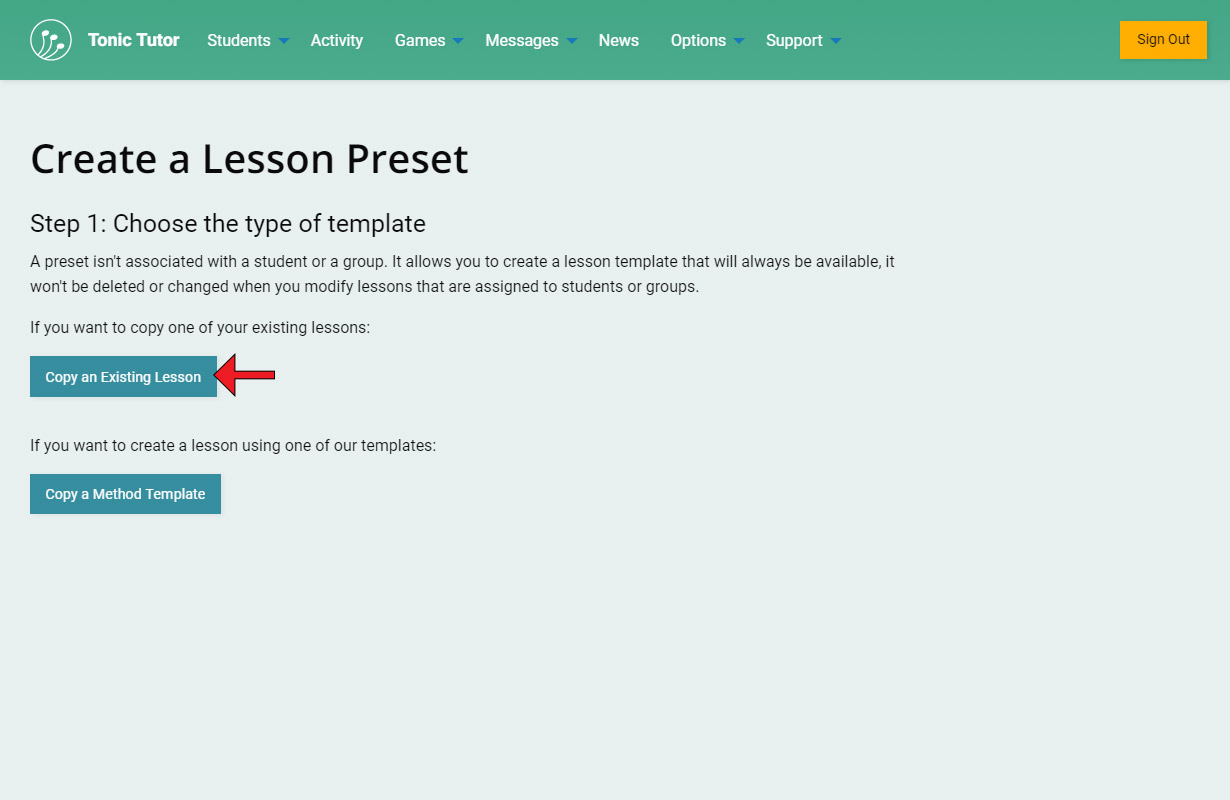
Near the top of the page is a button labeled Create a new Lesson Template: using that will take you through the same process you would go through to assign a lesson to a student or a group, but it will create a lesson template that isn't linked to a student or group. If you assign a lesson to a student or group and then assign a new lesson, it's possible you'll lose that template somewhere down the road. You can copy an existing student or group lesson (or a method preset template), and "bank" it for later. It can be a really powerful tool in your toolbox, allowing you to tweak lessons as your students progress. It's important to point out that it's entirely optional and there for your convenience.
To create a lesson that isn't associated with a student or group, use the Create a New Lesson Template button to go a page similar to the one in the Assigning a Lesson tutorial. Something we didn't go over in that tutorial is the option that appears if you have an existing student, group, or custom template. If that's the case, you'll see a button labeled Copy an Existing Lesson.
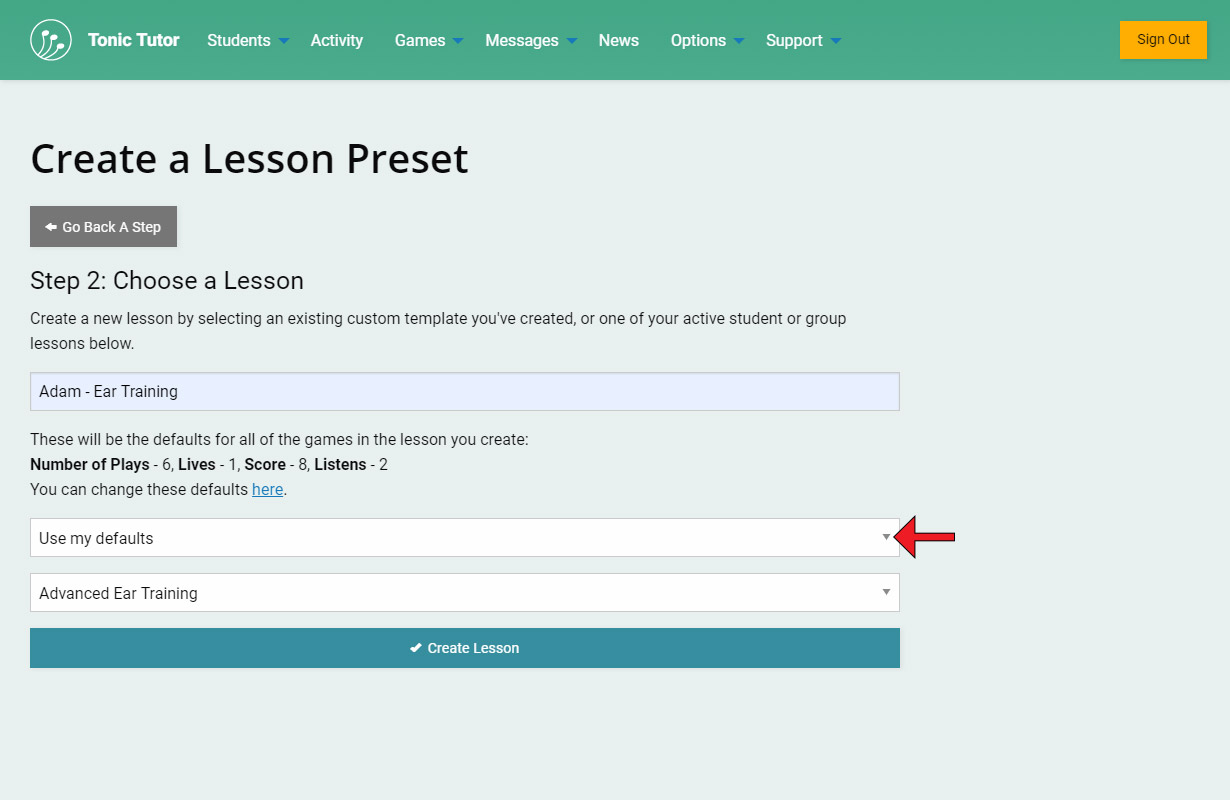
There's a drop-down menu with a list of all of the lesson templates you've created or assigned to students and groups. There's also an input where you can enter a name for the new lesson. In the example I'm copying the Advanced Ear Training lesson and labeling it Adam - Ear Training. You can also choose to apply the defaults we covered in the tutorial, or if you'd prefer to use the settings for number of plays, lives, score, and listens from the lesson template you're copying, you can select Use template settings for plays, lives, score, and listens from the drop-down menu above the template options.
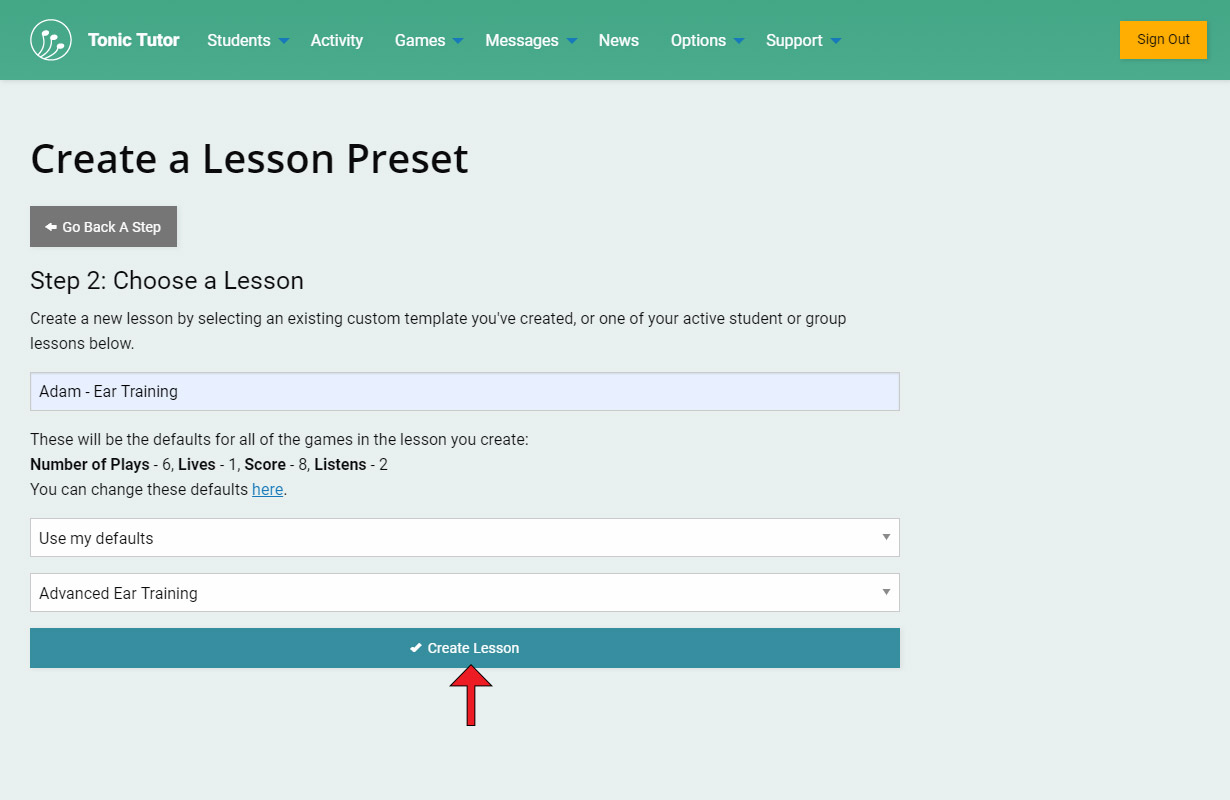
After I use the Create Lesson button, I'll go and edit it and create a lesson that I'll use a few weeks down the road for Adam that focuses on Ear Training. We're showing you how to copy an existing lesson template to create a new custom template, but it's important to note that you can assign one of your existing lesson templates exactly the same way when you're assigning a lesson to a student or group, it works exactly the same.
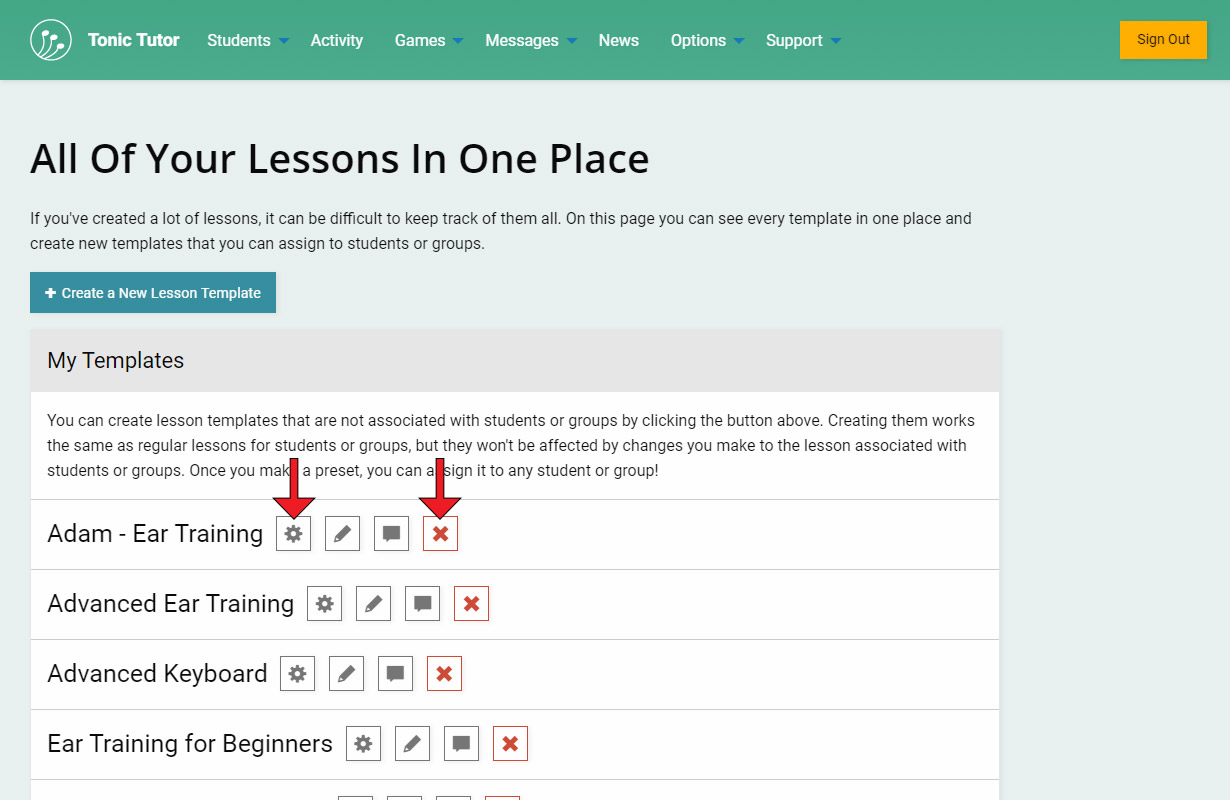
There it is! Notice how all of the lessons on this page have a row of buttons with icons? The icon that looks like a gear will take you to the Edit Lesson page for that lesson which we covered in the Editing a Lesson tutorial. The custom templates have a Delete button which looks like a red X while the student and group lessons don't. That's because student and group lessons can only be replaced, they can't be removed. We do have an option to disable lessons which we cover in the Disabling Lessons tutorial. If you delete a custom preset, it can't be reversed, so use it with caution! The other two icons are for Lesson Notes which we'll learn about shortly.
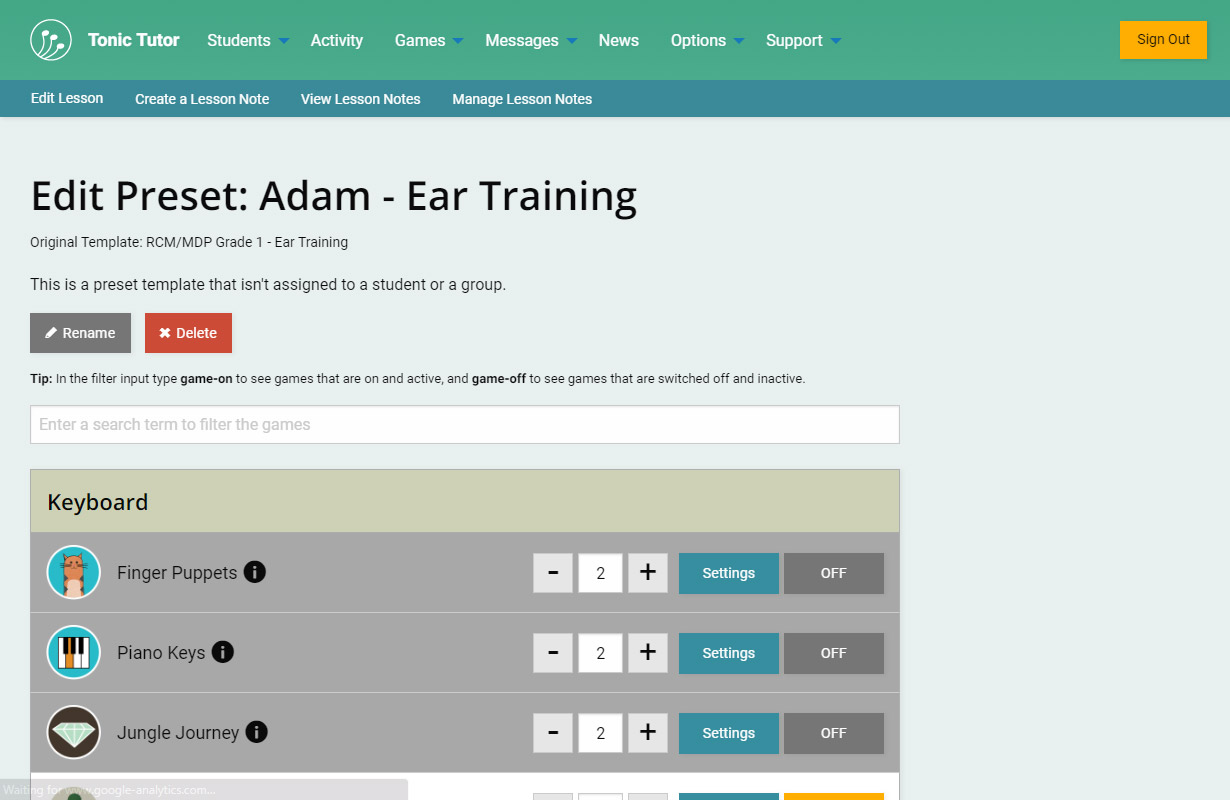
The Edit Lesson page for custom presets is almost identical to the pages for student and group lessons. The only difference is that there are two buttons: the Rename which you can use to change the name of the custom template, and the Delete button you can use to delete the template.
View the next tutorial: Lesson Times